

My latest build–a hangman’s crossroads–is very straightforward and easy, especially compared to my previous dwarven shrine project.
Step 1: Deciding what to build and with what resources
The inspiration for this terrain build is simple and not very exciting. While browsing Irregular Miniatures for some fantasy figures, I came across their gibbet and victim scenic piece. I didn’t know what I wanted it for, but I picked it up because it seemed so unusual and interesting. When the package arrived, I sorted through it to ensure everything was there. The gibbet and victim stood out. I was also packing up some road scenics into a box, so I decided to make a crossroads with a hangman.
And let me just preface everything by pointing out I am by no means a master of this hobby. I’m not exceptionally skilled at painting nor at building terrain. What I have is creativity and an enthusiasm I hope develops into skill. By sharing my process, my hope is others who feel the same way are encourage to try new things and start building more.
I used the following in my build:
- A 6×6-inch white canvas board from DeSerres
- The gibbet and victim figure that would be central to this build
- Soilworks rough acrylic paste from Scale75
- white glue
- “super” glue
- Mod Podge
- hobby paints and brushes
- Woodland Scenics earth blend, blended turf
- Bachman SceneScapes Ground Clover
- Sand
- Krylon matte finish spray
- small stones
- Loose “foliage” that fell off some of my larger tree scenics
With my supplies in hand, it was time to set to work.
Step 2: Cutting the base down to crossroads size
 I use the 6mm-scale roads from Fat Franks Wargaming Terrain for my 6mm games. This means I needed to size the hangman’s crossroads built to fit four such road pieces intersecting. I didn’t want the crossroads piece to be too large, though. The DeSerres canvas boards are very versatile for basing, so I decided to go with that for my crossroads instead of one of my more costly MDF bases.
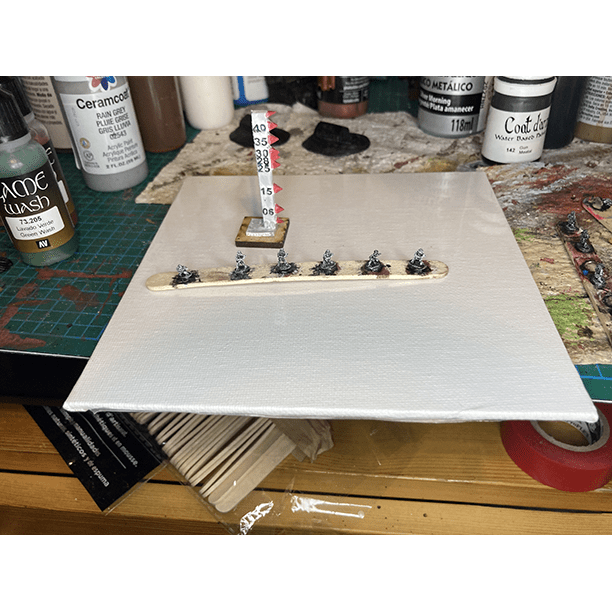
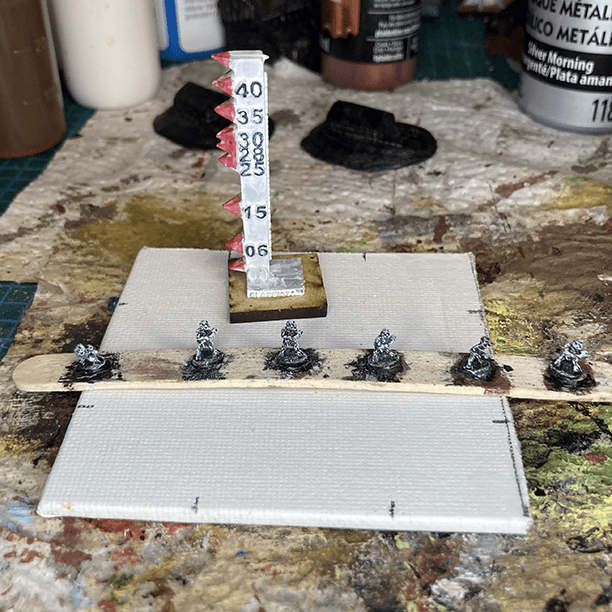
I started with a 6×6-inch canvas board. (See the photo with the popsicle stick of 6 Microworld ghouls in mid-paint, provided for scale.) I cut it into four 3×3″ inch pieces (see the next picture, again with ghouls for scale.) These cut fairly easily with a box cutter. I’d use one of these squares for my hangman’s crossroad and save the rest for other projects.
Cutting the canvas board leaves two rough edges of the exposed board. I sanded these down and then sealed them with Mod Podge. Doing so prevents the rough edges from splitting over time and stops them from warping when painted.
Fat Frank’s road pieces at this scale are fairly uniform at about 30mm wide. So, I grabbed a road piece and held it to my base’s edge. With a pencil, I marked where I wanted the roads to connect to my hangman’s crossroads in play.
Step 3: Adding textures to the hangman’s crossroads base

 I used a pencil to extend the marks I made earlier to determine where the adjacent roads will intersect on the crossroads base. This process created rectangles in the corners that indicated where the roadside areas would be located. I also painted the base edges a dark brown.
Using my standard white glue/water mix (80%/20%), I covered the roadside areas with sand. I did two lairs, adding the second once the first had dried.
When both lairs of sand had dried, I used an old brush to paint the remaining base with Soilworks rough acrylic paste. This area will be the actual crossroads. The rough paste gives the “roads” a churned-up, muddy look once painted.
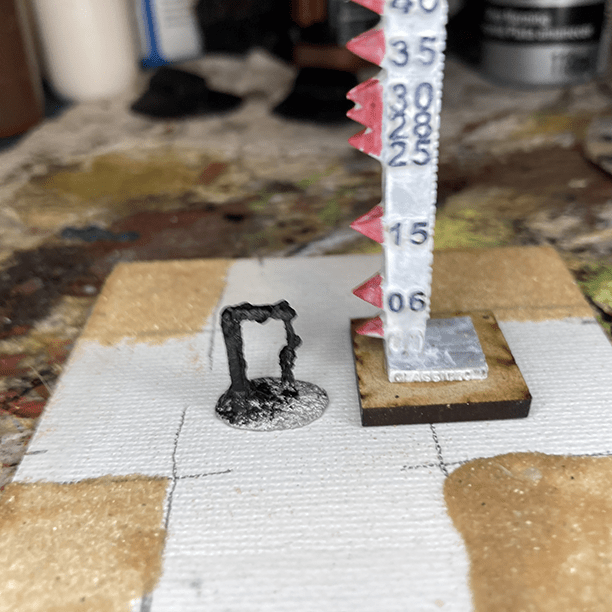
I’ve added the hangman for scale. (You can see I’d started hand-priming it black.)
Step 4: Painting the unfortunate hanged man
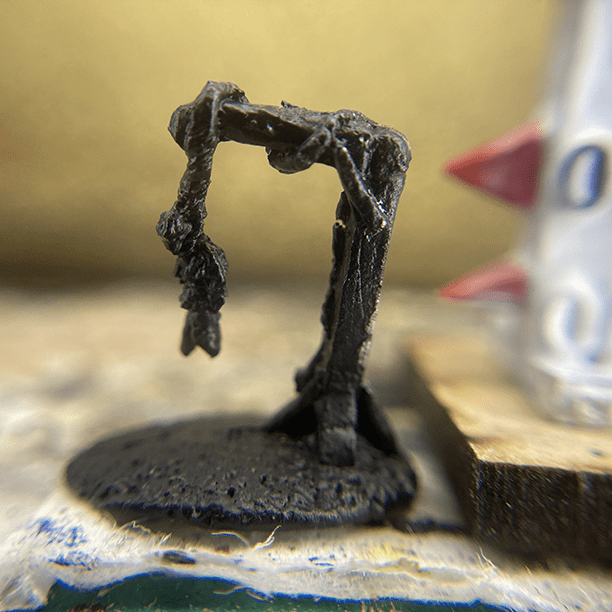
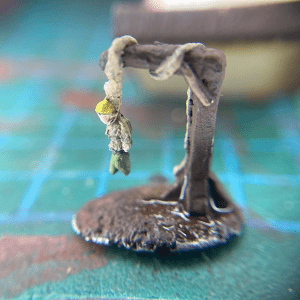 Up next, the hanged man miniature provided by Irregular Miniatures (go to the 6mm scenic section to get your own) needed to be added. First, I finished hand-priming it in black.
The base was painted the same basic brown I used to paint the base edges (and to cover the roadside sand areas later.) I kept things simple by painting the wood chestnut brown and the rope a desert tan. The supporting boards at the joint are territorial beige to stand out a bit.
The hanged man’s flesh was painted pale flesh (no rosy cheeks for the dead.) The hair is basic yellow. The pants are leaf green and the shirt camo beige/green.
I finished things off with some dry brushed light grey highlights and a black wash.
Step 5: Painting the base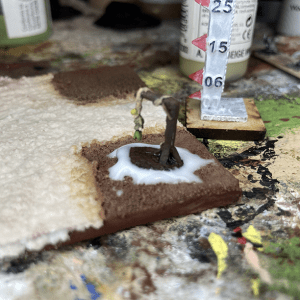 : roadside areas
 As previously mentioned, I covered the roadside areas in a dull brown. This is the same cheap brown I use for most of my terrain base edges and anywhere I’ll flock with grass.
When the paint dried, I used super glue to stick my hanged man to the crossroads named for him. The figure’s fit to the base was uneven due to a combination of its casting and the sand it was sitting on. I applied some undiluted white glue to fill the resulting gaps. Doing so prevents keeping a visible gap that will remain even when the flocking is applied.
Step 6: Painting the crossroads and adding grass
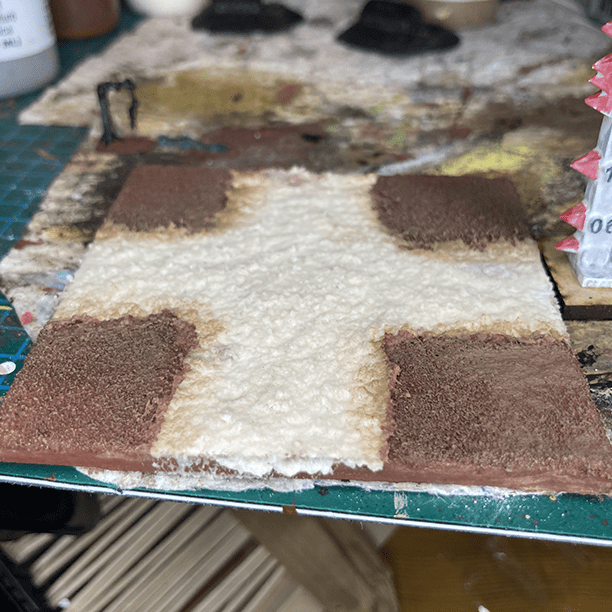
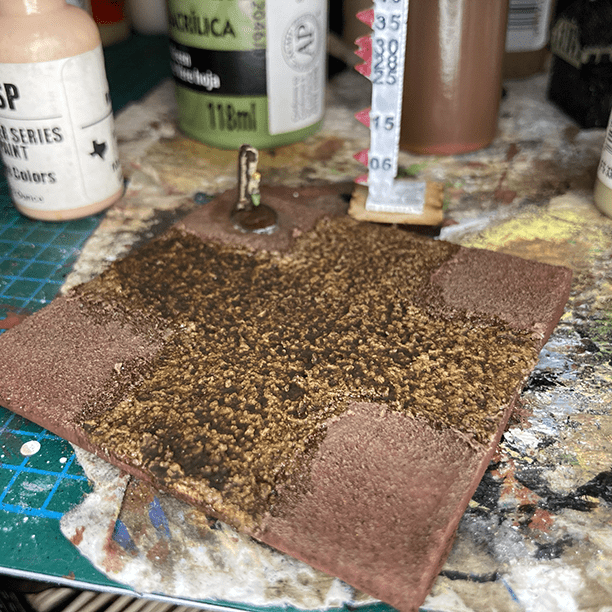 Instead of painting the white roads of dried acrylic paste, I leaned into it. I added several layers of brown wash directly to the paste, allowing each to dry in between. Because the paste is so rough, the wash really pooled well in it. The risen bumps browned but came out much lighter, leaving natural highlights. Still, I dry-brushed some more highlights onto the crossroads using my territorial beige for extra detail.
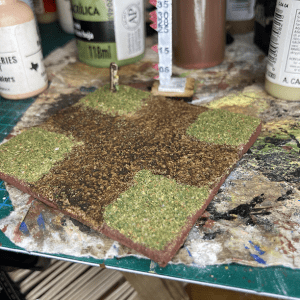
With the roads dry, I pulled out my white glue/water mix again to cover the roadside sections. I sprinkled on a 50/50 mix of my Woodland Scenics blended turf and SceneScapes ground clover. This is my mix of choice because it finds a middle ground between the former’s summer green and the latter’s fall, dead grass looks.
I’d considered using static grass instead of flocking but decided against it. The static grass is noticeably taller, and I didn’t want the space beneath the hanged man to be obscured. I wanted it to be clear he was suspended off the ground.
Step 7: The finishing touches
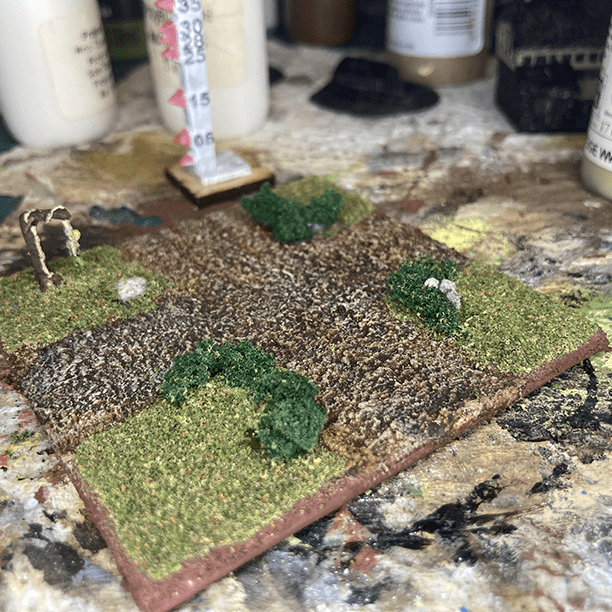 I could have left things as they were, but I felt something was still missing. The crossroads seemed too barren and flat. Looking over my shelf of odds, ends, and bits, I spotted containers of stones for basing and some tufts of foliage I’d saved after it fell off some model railroad large trees I’d used years ago. I used the green tufts to create a trio of small hedges on the corners not occupied by the hanged man. I also put in some stones to add something other than flora alone. The tufts and stones were both added with white glue.
Now that it’s done, this terrain piece has the practical job of joining roads and an optional secondary purpose. I want to take advantage of the myths surrounding crossroads and why people were hung at them to confuse spirits. In fantasy wargames where the undead take the field, the hangman’s crossroads can also serve as an objective or place of power. My ideas for using the crossroads range from being as simple as a capture point (a crossroads is key for transportation) to a location where undead regenerate.
Relatively speaking, my hangman’s crossroads was a very easy build. There was no height to build up, no plasterwork, no detailed painting, and few add-ons. I banged this out in just a few hours, with most of that time spent waiting for various things to dry. And because it had multiple components–the base and the hangman figure–I could work on one while the other dried. If you’re new to terrain building, I suggest a simple project like this to build your skills.
Regardless of how it ends up on the table, I’m hoping my hangman’s crossroads won’t leave you hanging (ba-dum-bum!)
Steven Trustrum
Steven Trustrum has been writing in the RPG industry since the end of the '90s and publishing via Misfit Studios since 2003. Aside from writing and publishing role-playing game content, he ... dabbles ... in content and social media marketing.