

Over the past few months, I’ve begun to peck away at a new project that takes Misfit Studios in a new direction: wargaming. I haven’t played since I was in university when I fielded almost entirely unpainted Eldar and Chaos armies for Epic Warhammer 40k. I loved the 6mm (epic) scale but didn’t have the money at the time to pursue it. Now I have both the resources and time to not only play but to make my own game. Enter Terrible, Fond Wars, the upcoming 6mm wargame from Misfit Studios.
Drawing its name from Robert E. Lee’s famous quote, “It is well that war is so terrible, or we should grow too fond of it,” Terrible, Fond Wars will draw on existing role-playing game roots to create an extensive, adaptable mass combat system on a tiny-but-grand scale. (More on the role-playing game link at a later date.)
To jump back into not just the wargaming hobby after such a long absence, but also into publishing for it, I’ve started with fantasy armies. I’ve decided to build a dwarven army for myself and an undead army for my son, who will be helping with playtesting. I expect objectives and fortifications to have an important part to play in Terrible, Fond Wars, so I thought I’d jump back in with a simple build. (I say “simple” without claiming to be an expert wargaming painter or terrain builder. I enjoy the hobby and merely do the best I can. I hope my work inspires others in a similar position to expand outside their comfort zones and try building new things of their own.)
Step 1: Deciding what to build and with what resources
Before I started painting 6mm miniatures, I thought it would be a good idea to get some practice in by building some terrain. I started easy and slow with some simple things, like forest scatter terrain and the like. Once I got a bit more comfortable, I wanted to try something a bit more complex using what I already had in my office. As I’d already decided to build a dwarf army, I thought something for them would be ideal. But what to build? Some stock art I was readying for sale at the time gave me the idea to build a temple or shrine. Thus was the dwarven shrine idea born.
To build it, I began searching through old boxes of hobby supplies and found:
- cardboard I had laying around
- a hexagonal MDF terrain base, some plaster
- a dental plaster casting of an epic-scale door I don’t remember buying
- a Chainmail-brand, Dungeons & Dragons dwarf miniature (discontinued)
- white glue
- “super” glue
- hobby paints and brushes
- Woodland Scenics earth blend, blended turf
- Bachman SceneScapes Ground Clover
- Scene-O-Rama casting plaster
- Some random hobby grass tufts
- Sand
- Krylon matte finish spray
I then set to work.
Step 2: Building the inner foundation of my dwarven shrine
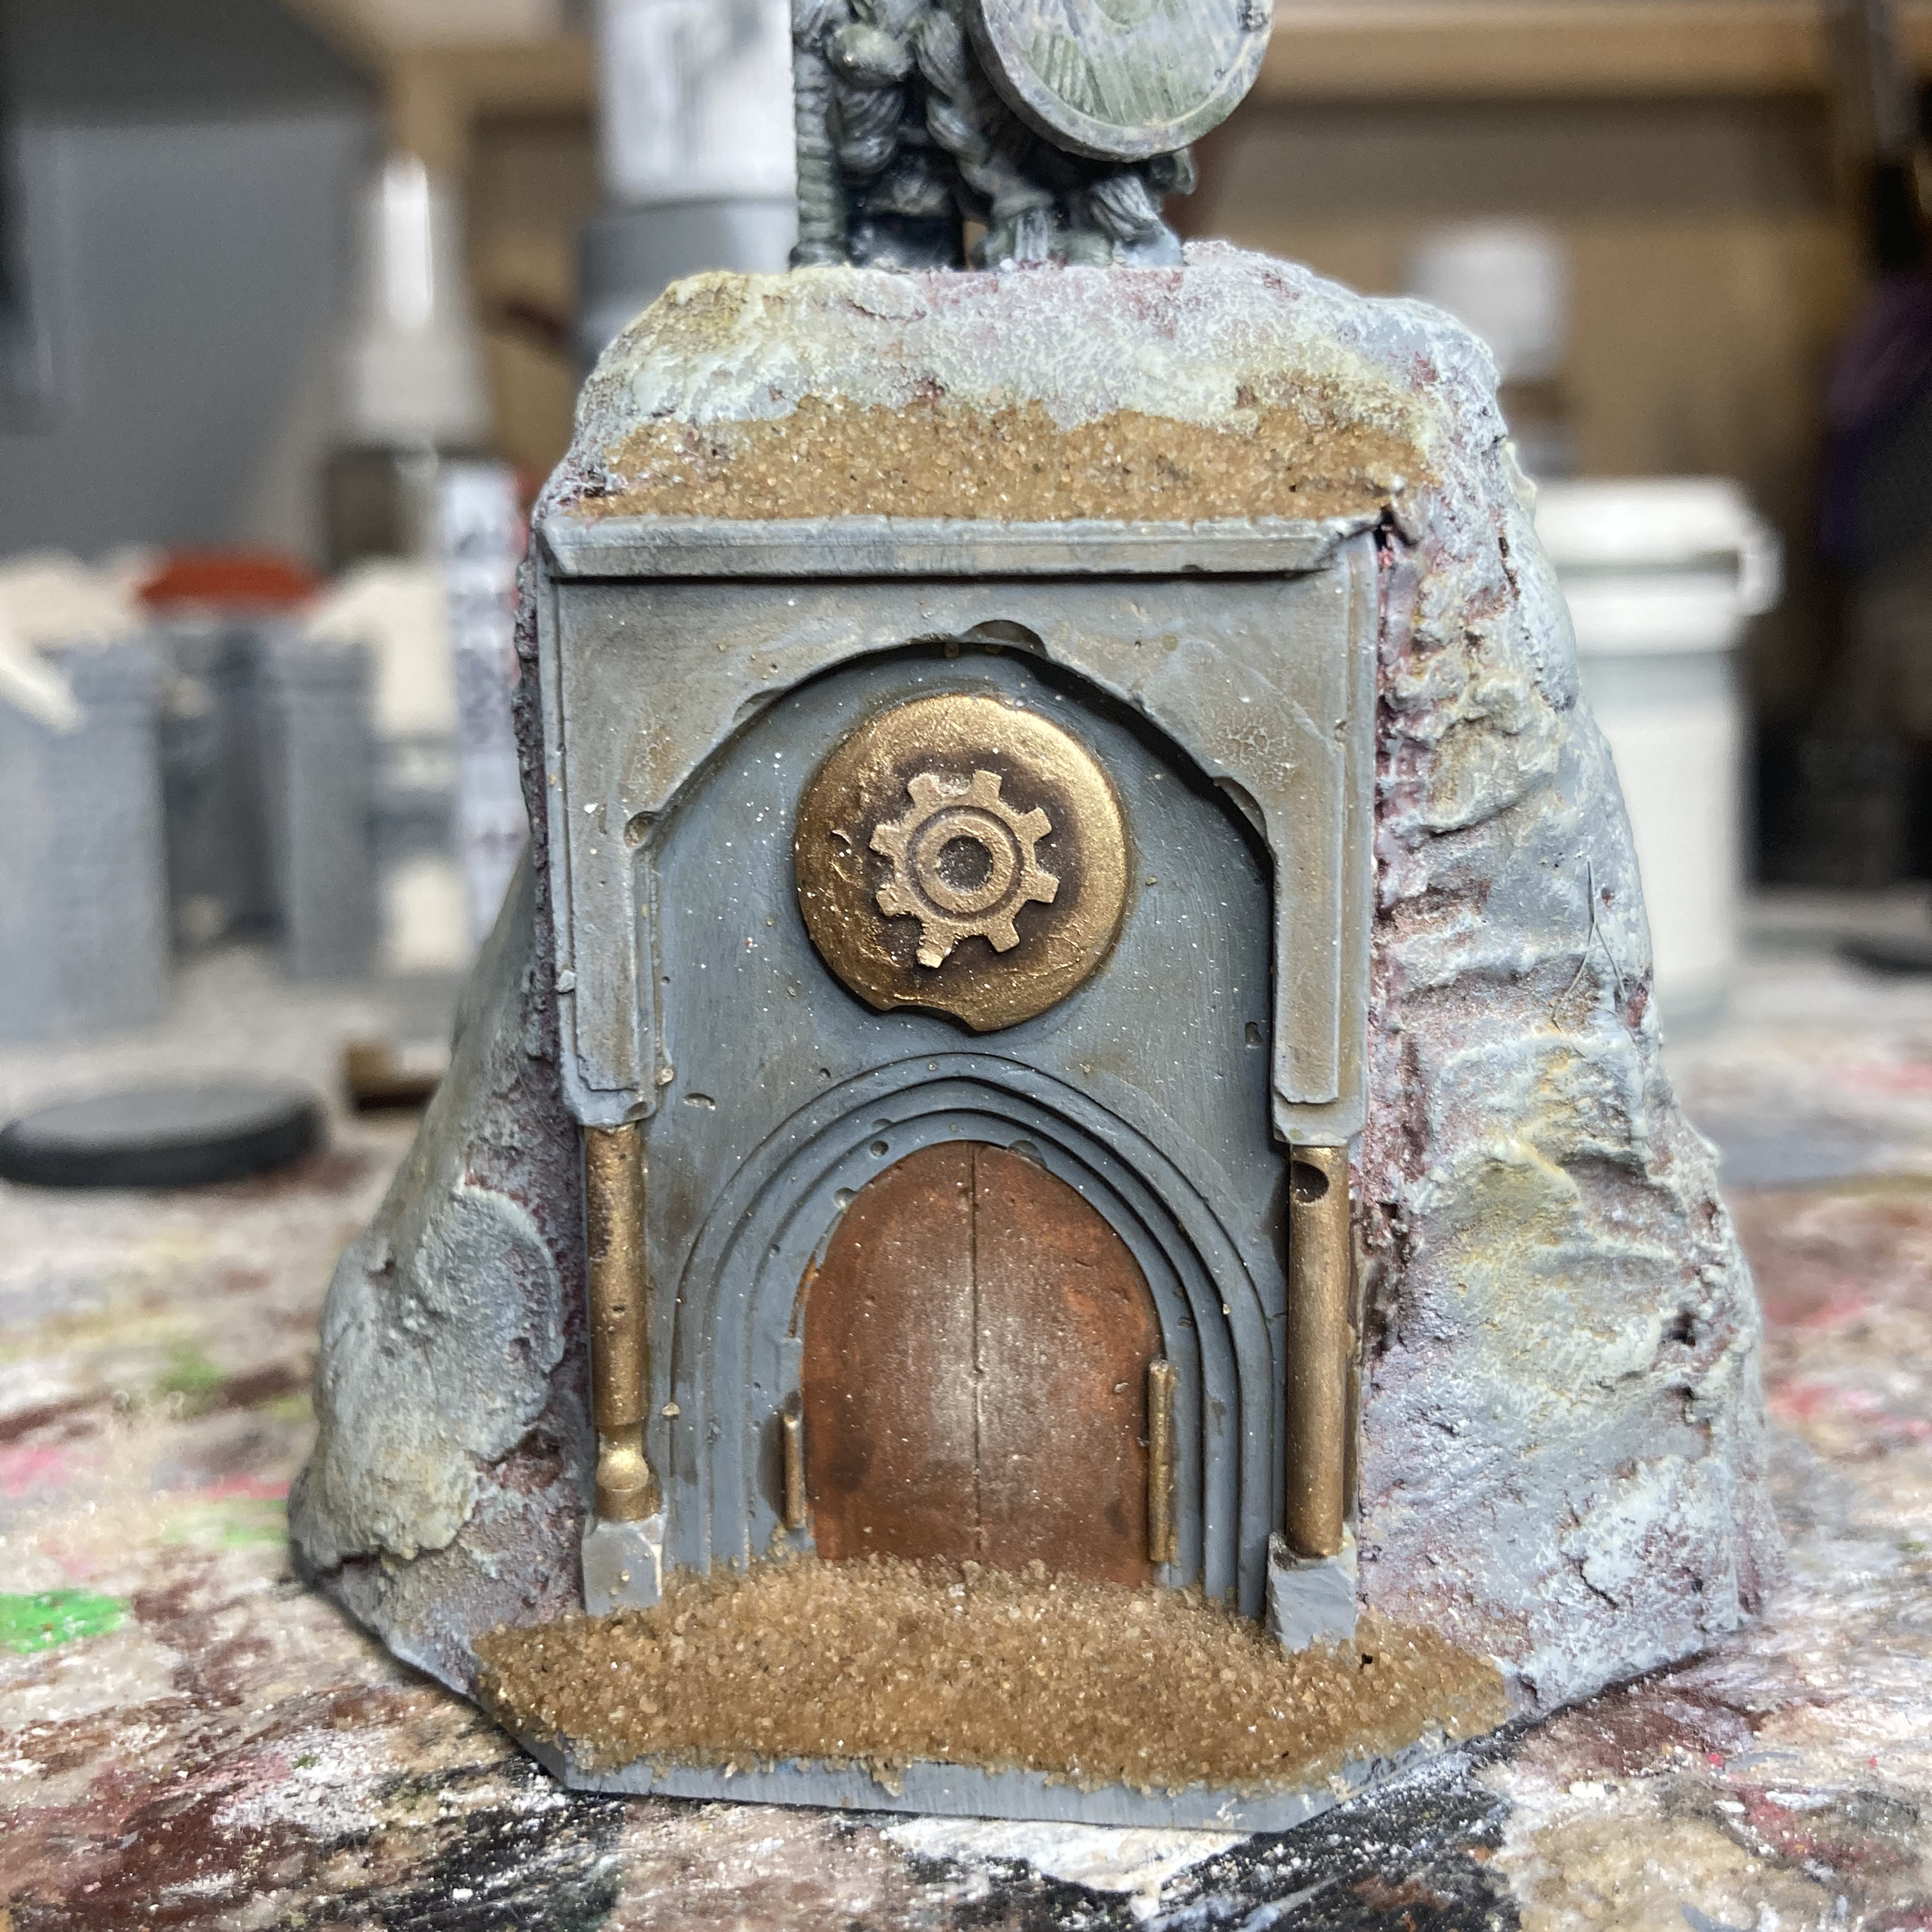
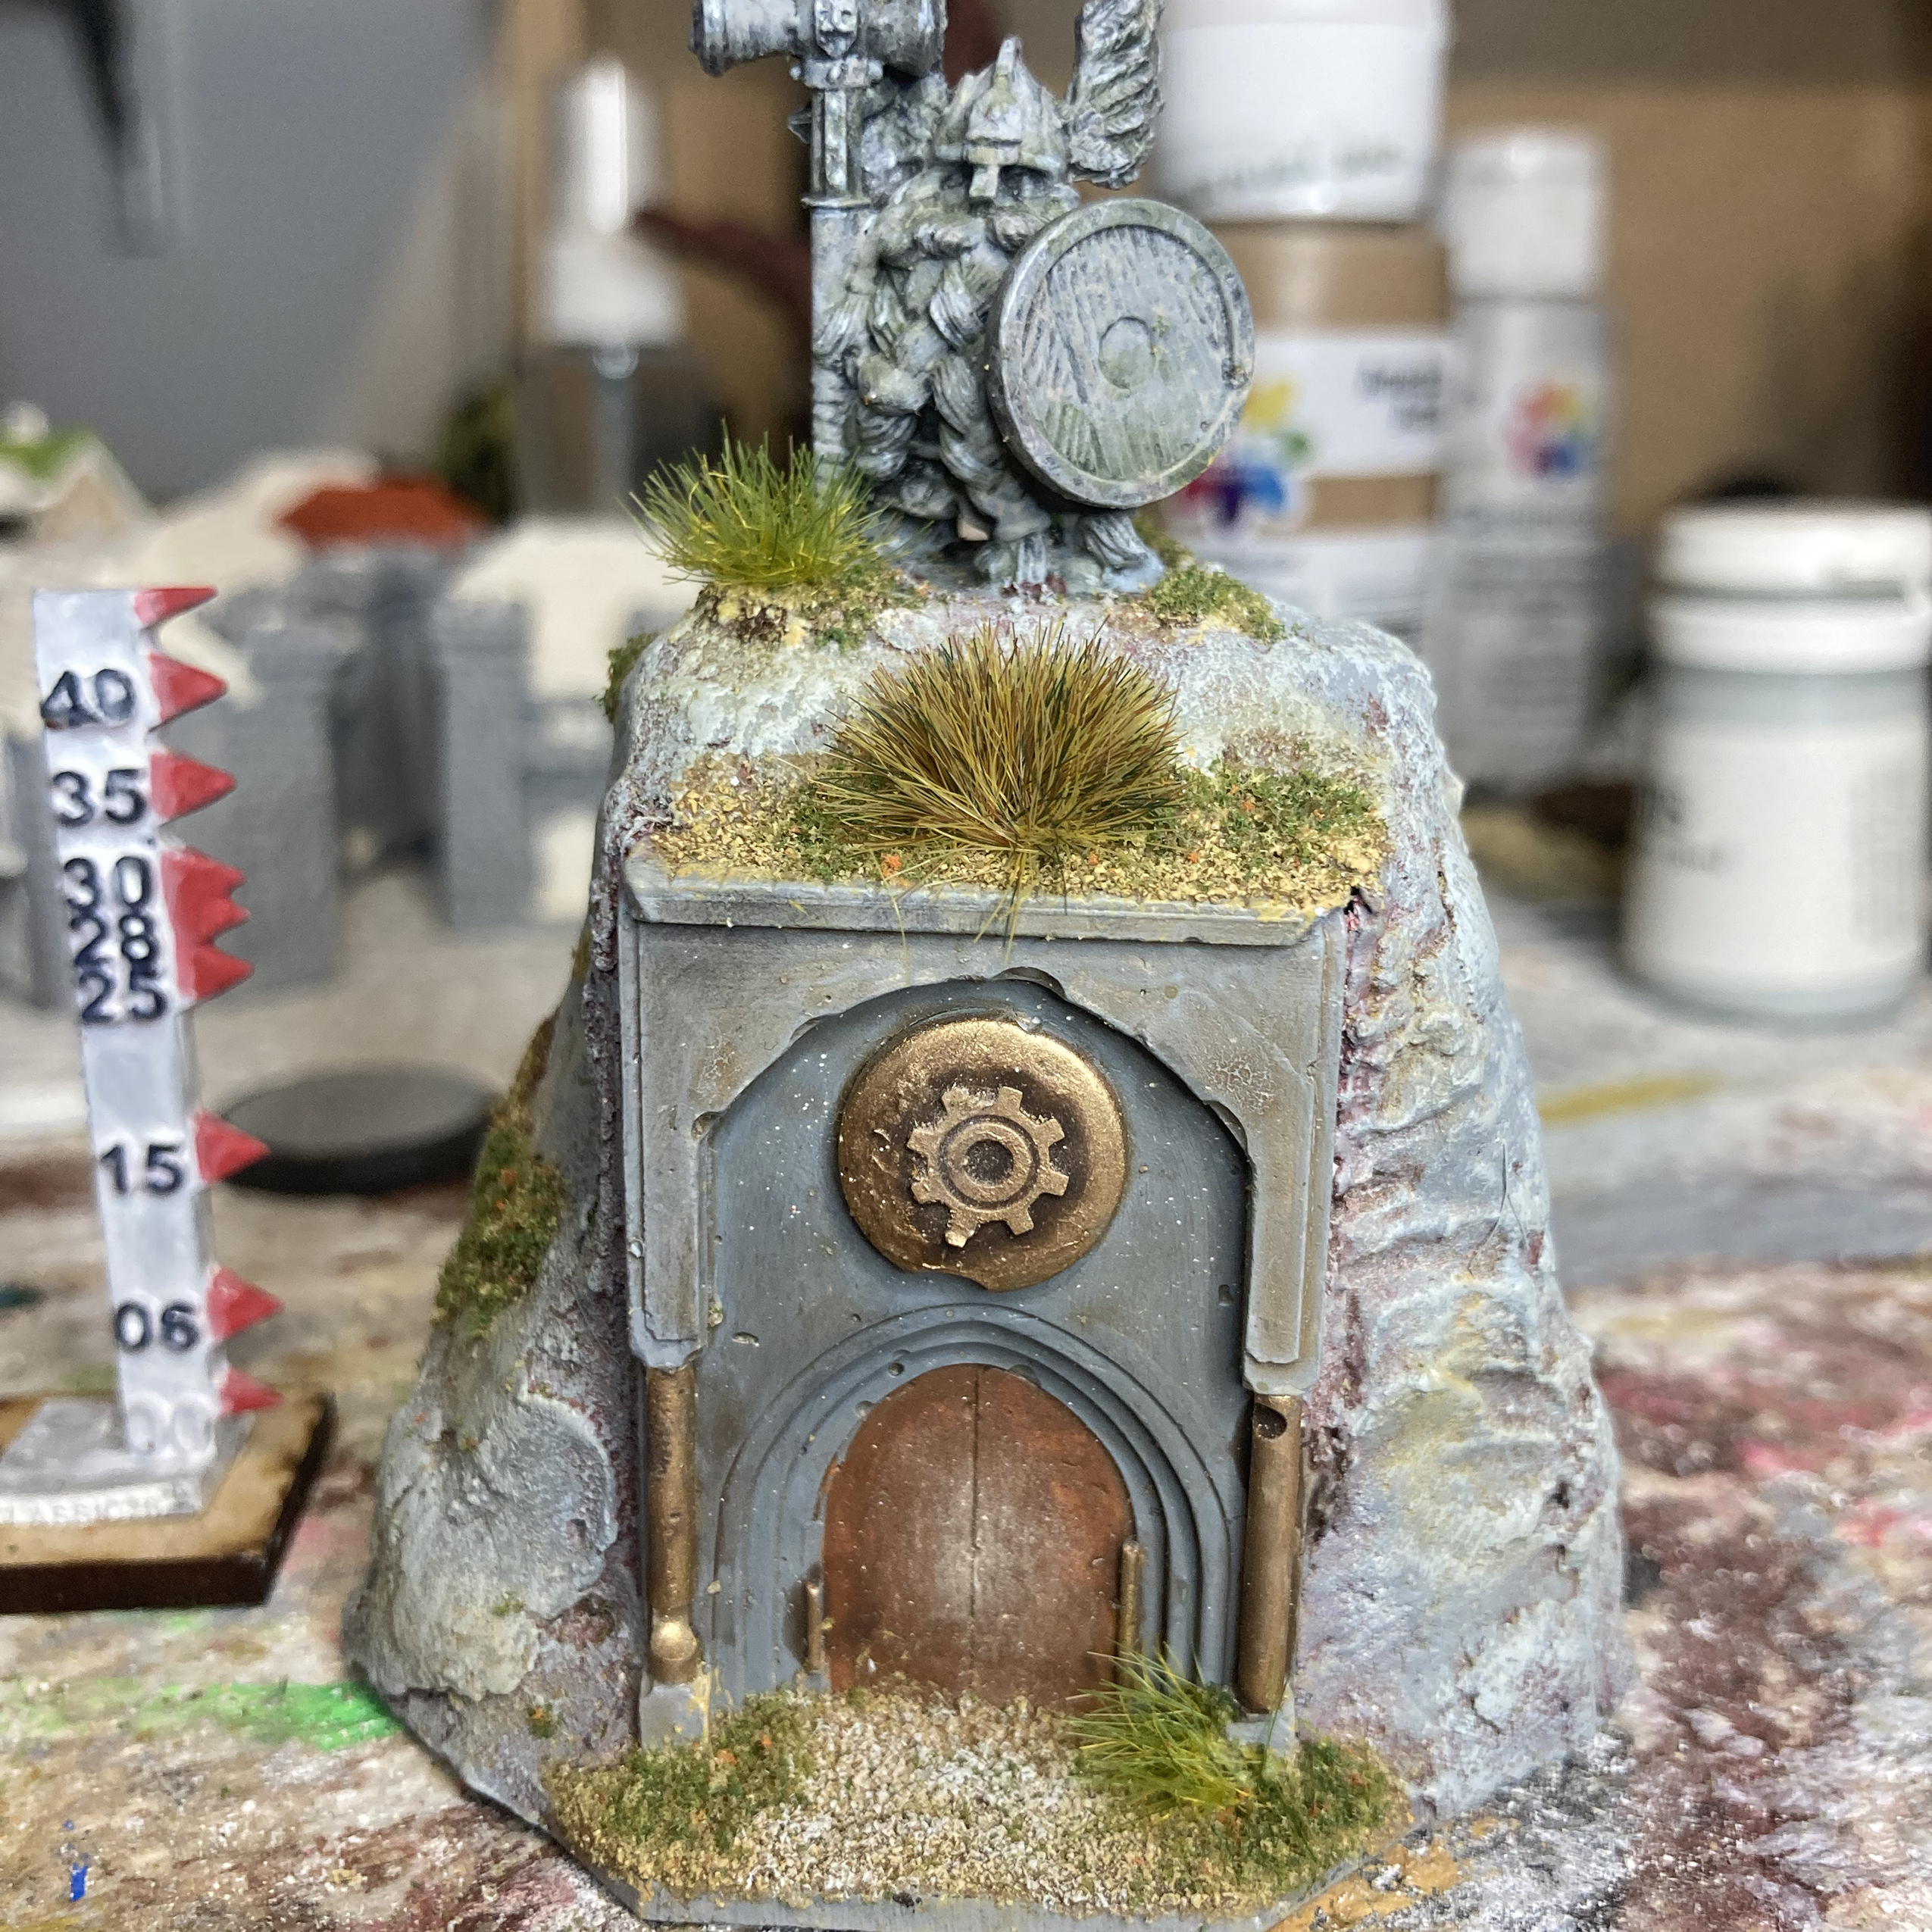
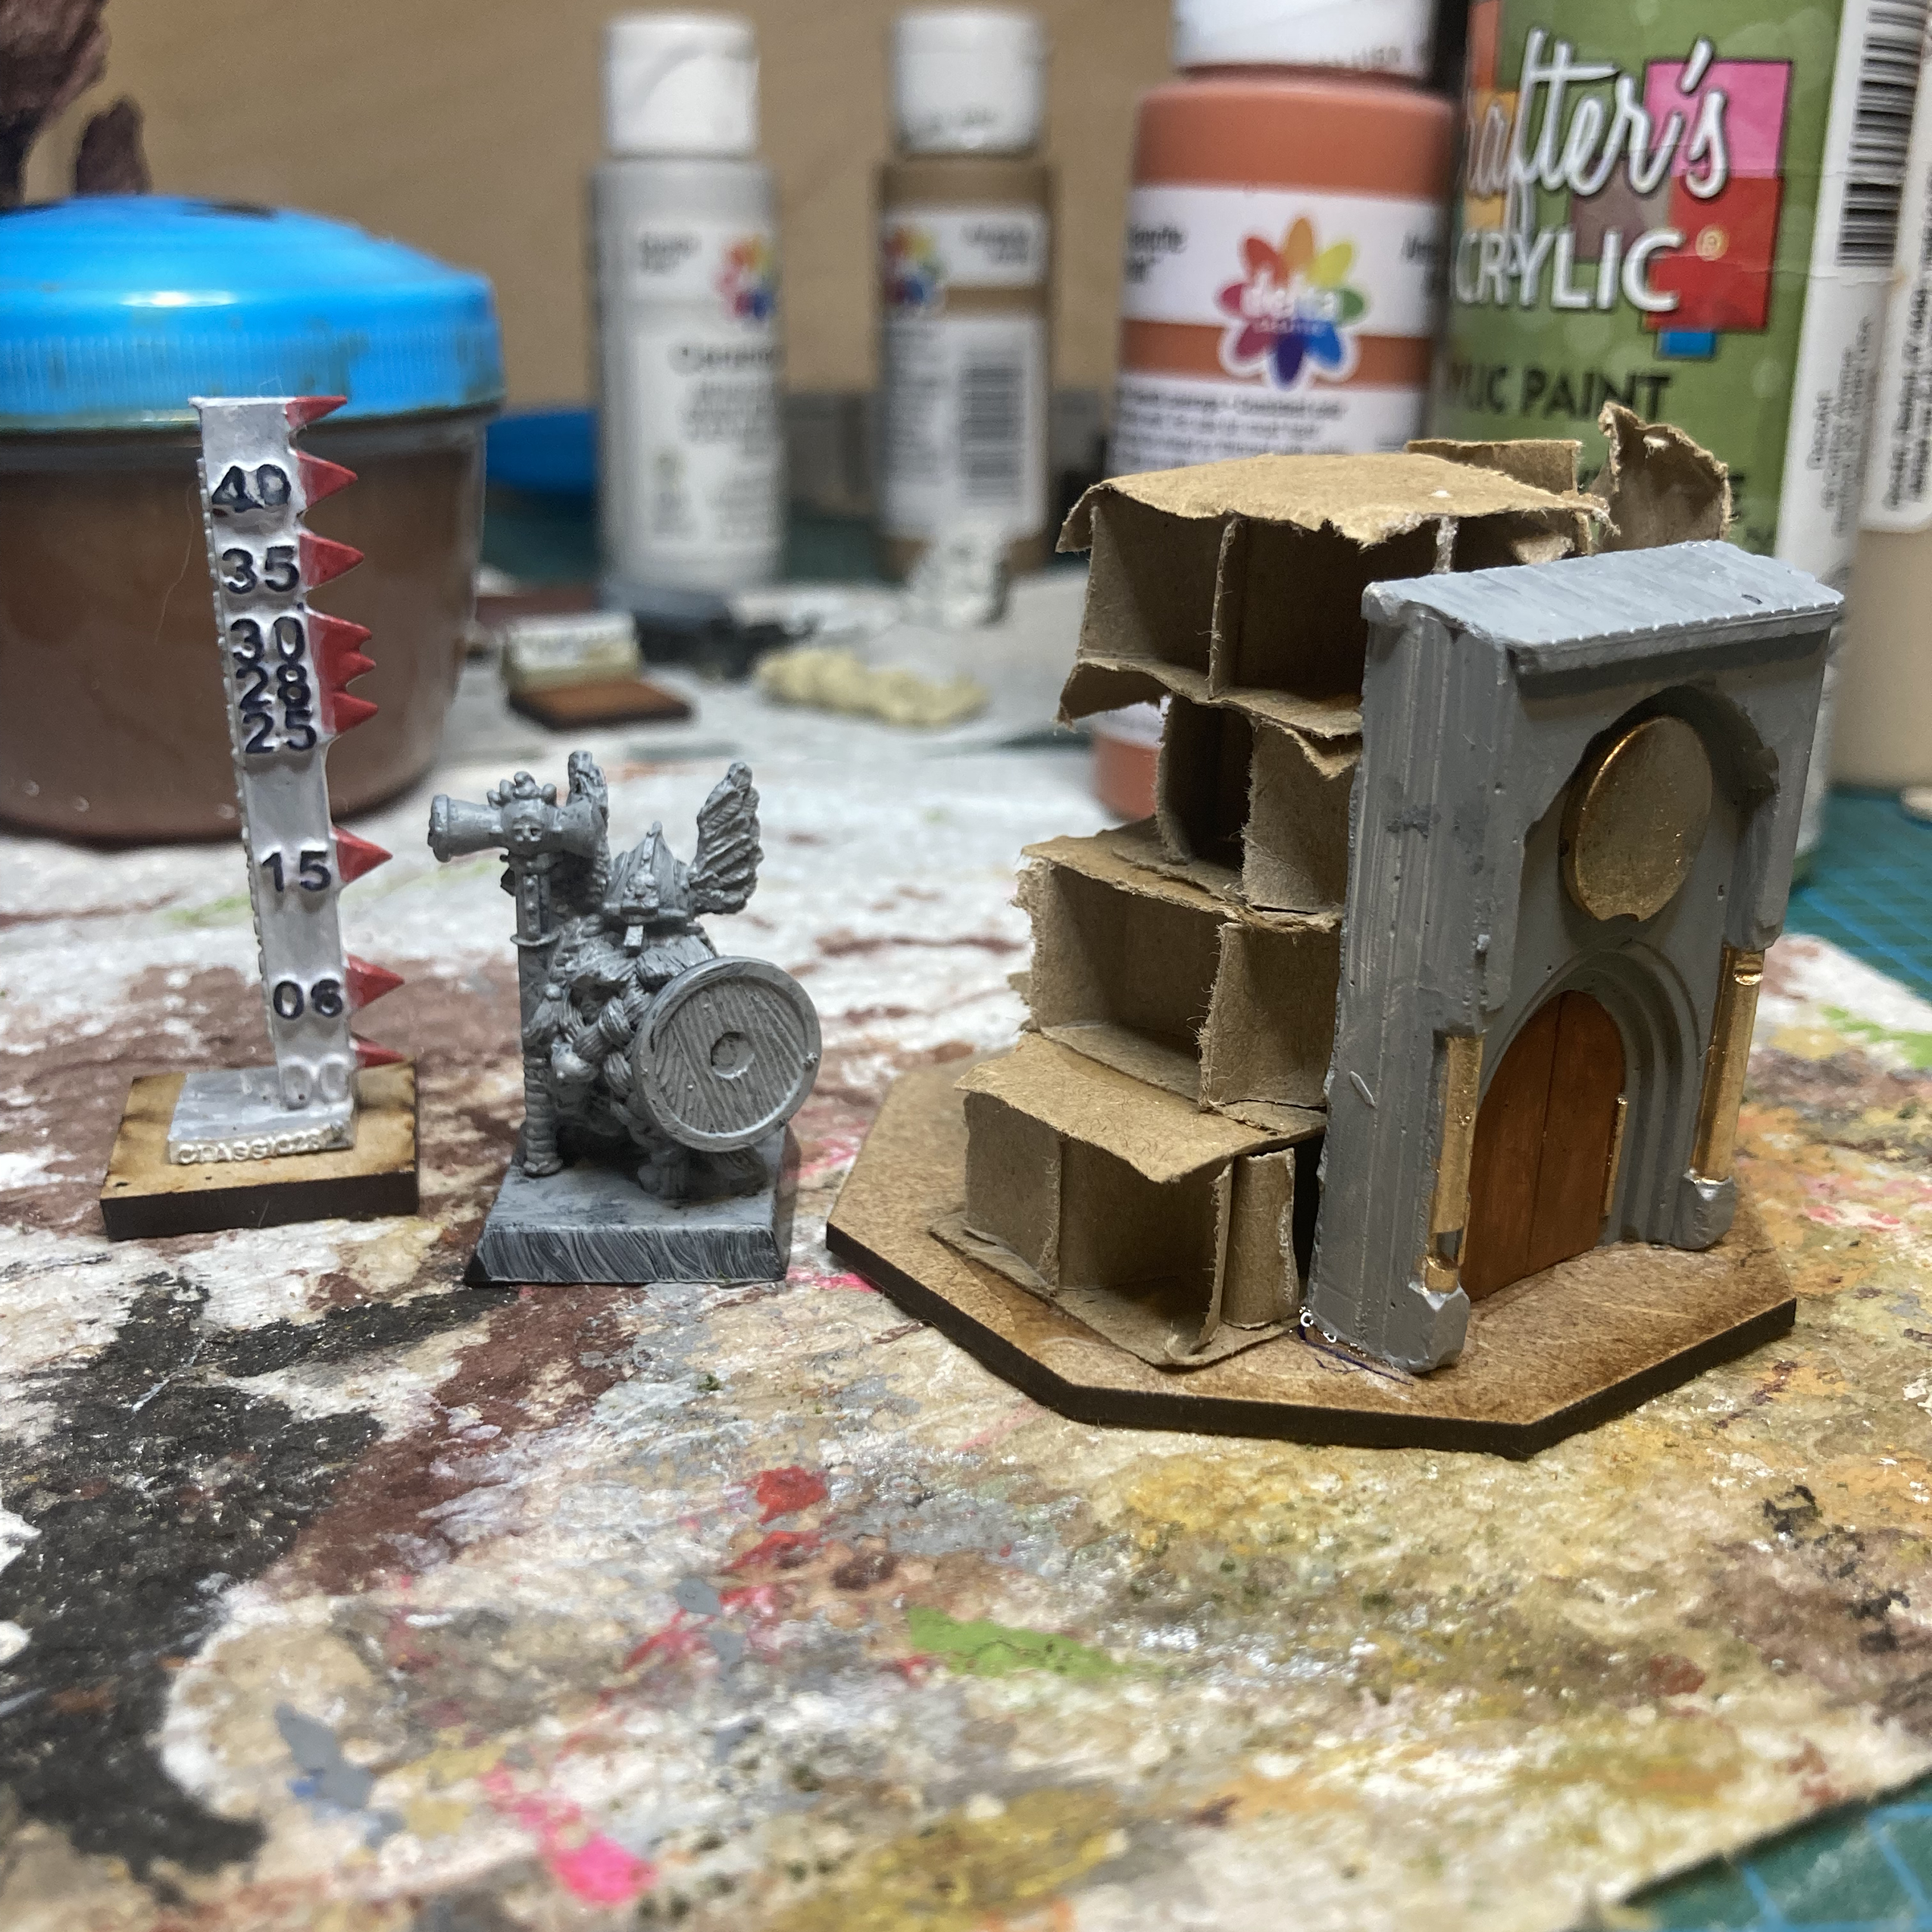 Once I had everything, I painted the plaster door first. I knew doing so later would be more difficult with everything around it. Most of it is painted a simple grey, but the door is chestnut brown, and the side pillars and circle above are gold.
Next, I cut incrementally smaller sections out of cardboard that were smaller than the MDF base. I cut uneven and awkward edges on three sides so the shrine wouldn’t have a uniform appearance. The fourth edge of each cardboard piece was left straight so it could be glued to the back of the plaster door. I was lucky to find the thick type of cardboard you see in the photo, as it gives volume while not becoming heavy, as would having to use many more layers of condensed cardboard.
White glue was used to glue the cardboard together and “super” glue for attaching the door and cardboard to the base, the the door to the cardboard.
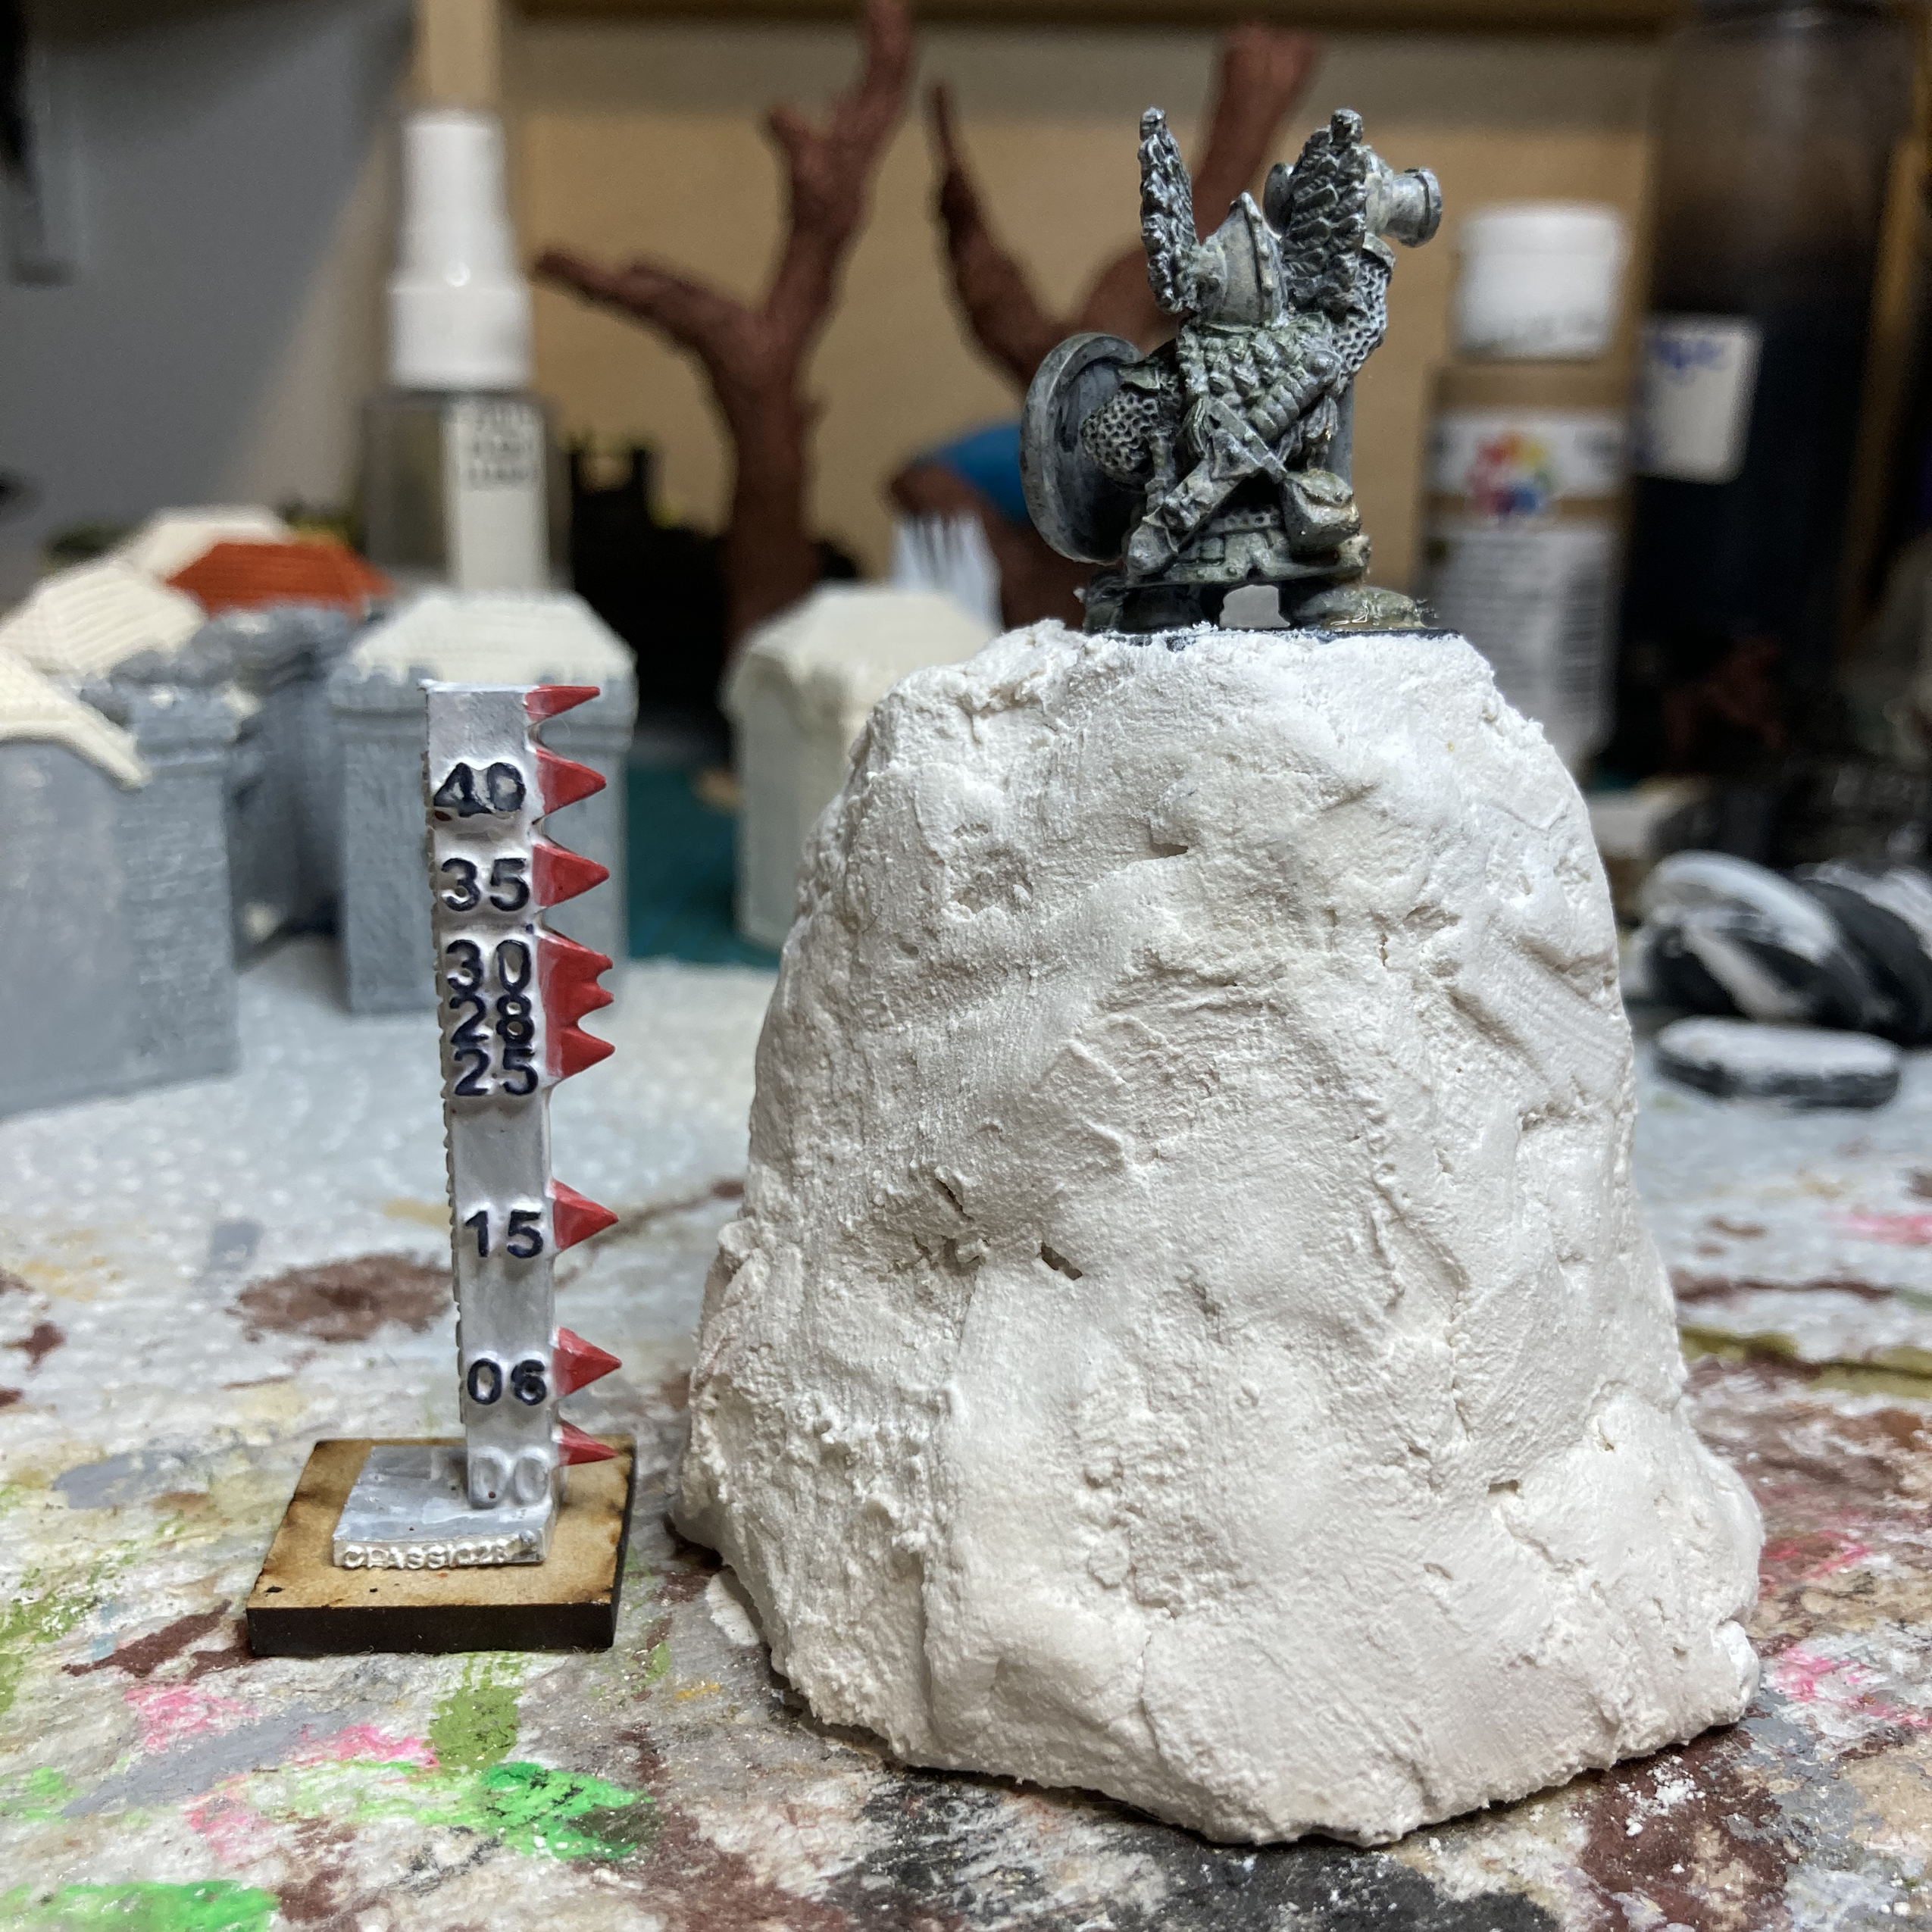
I’ve added the Chainmail miniature and my scale guide to the photo for an idea of how big this will be. The dwarf is unpainted but already mounted on a plastic base.
Step 3: Painting my dwarf statue
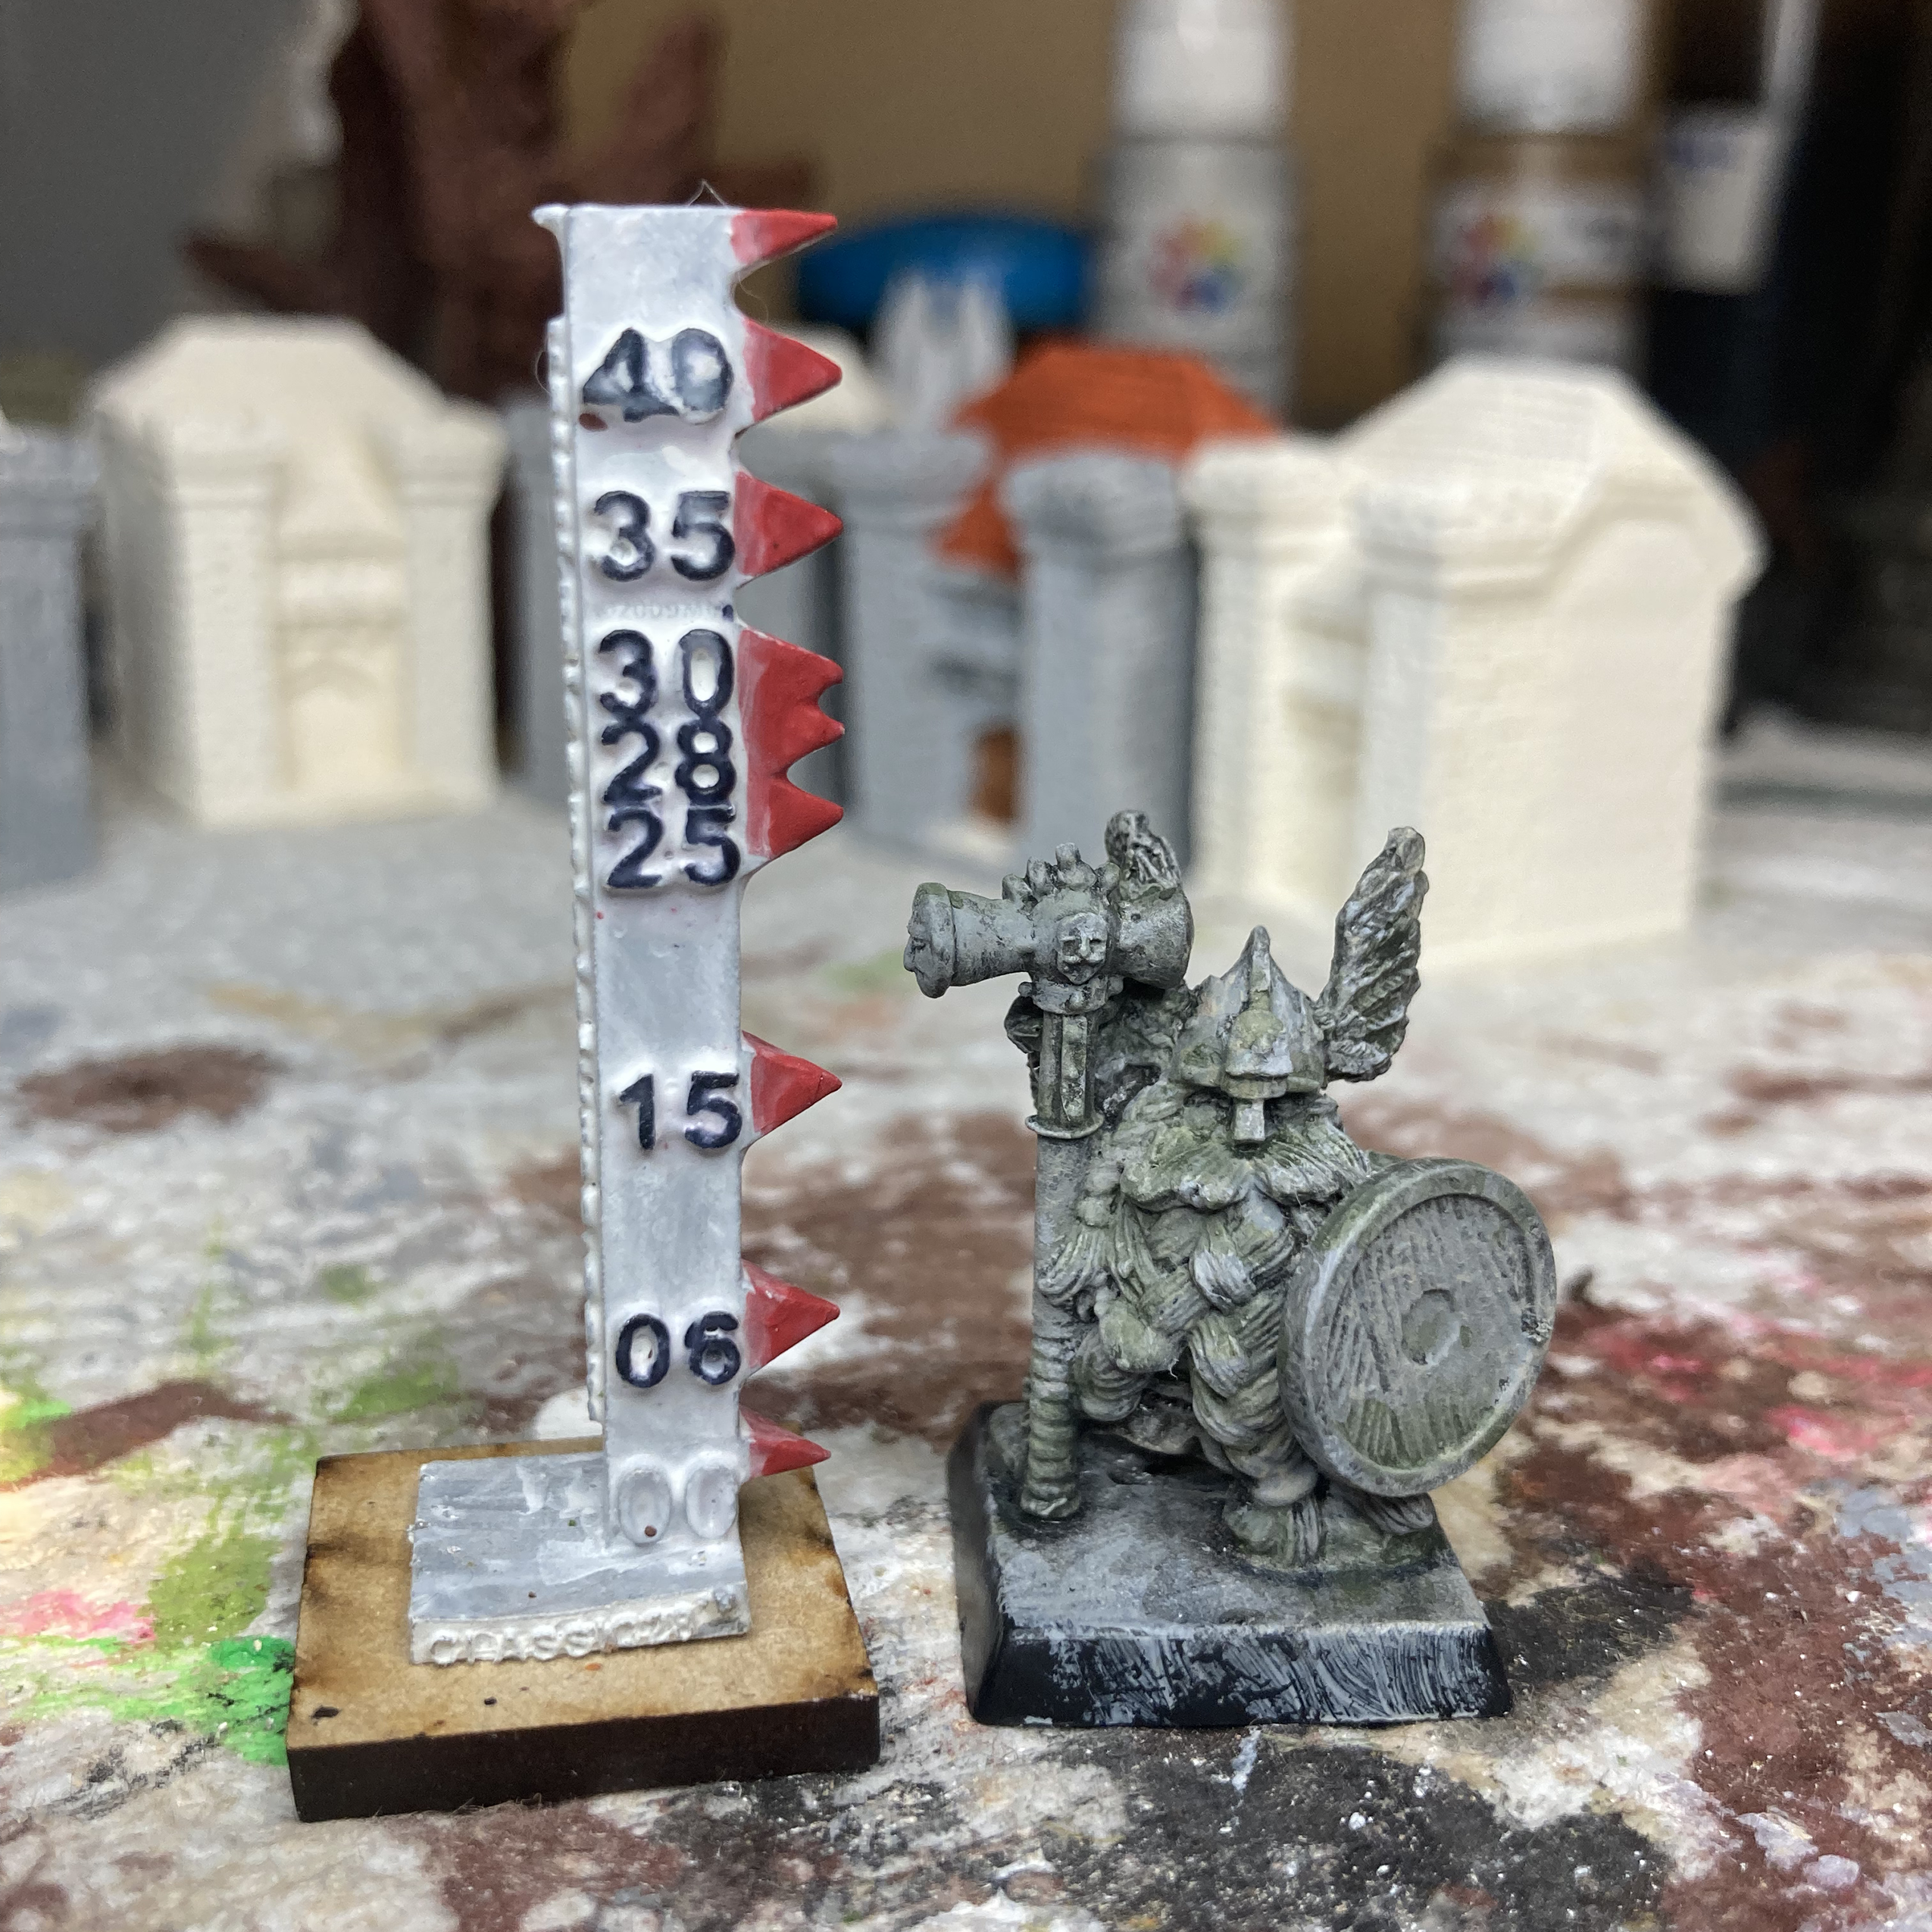 The Chainmail dwarf miniature always struck me as ideal for a statue, so that’s what I used it for. When done, it will sit atop my dwarven shrine, forever standing guard.
I started by priming it black and then giving it a uniform coat of rain grey. I then dry-brushed it with a broad sweep of lighter, concrete grey and followed up with dry-brushing details with elven grey. This gave the details a weather-worn, stone-like appearance. I added to this effect by lightly dry-brushing tan highlights and lichen weathering powders to further age it. The last touch was a black wash to make the details and depths pop.
Step 4: Closing the dwarven shrine with plaster cloth
 Back to the dwarven shrine, I now needed to close off the inner foundation. Having waited long enough for the glue on the cardboard to dry, it was strong enough to be picked up, meaning it was strong enough to bear the weight of a plaster shell.
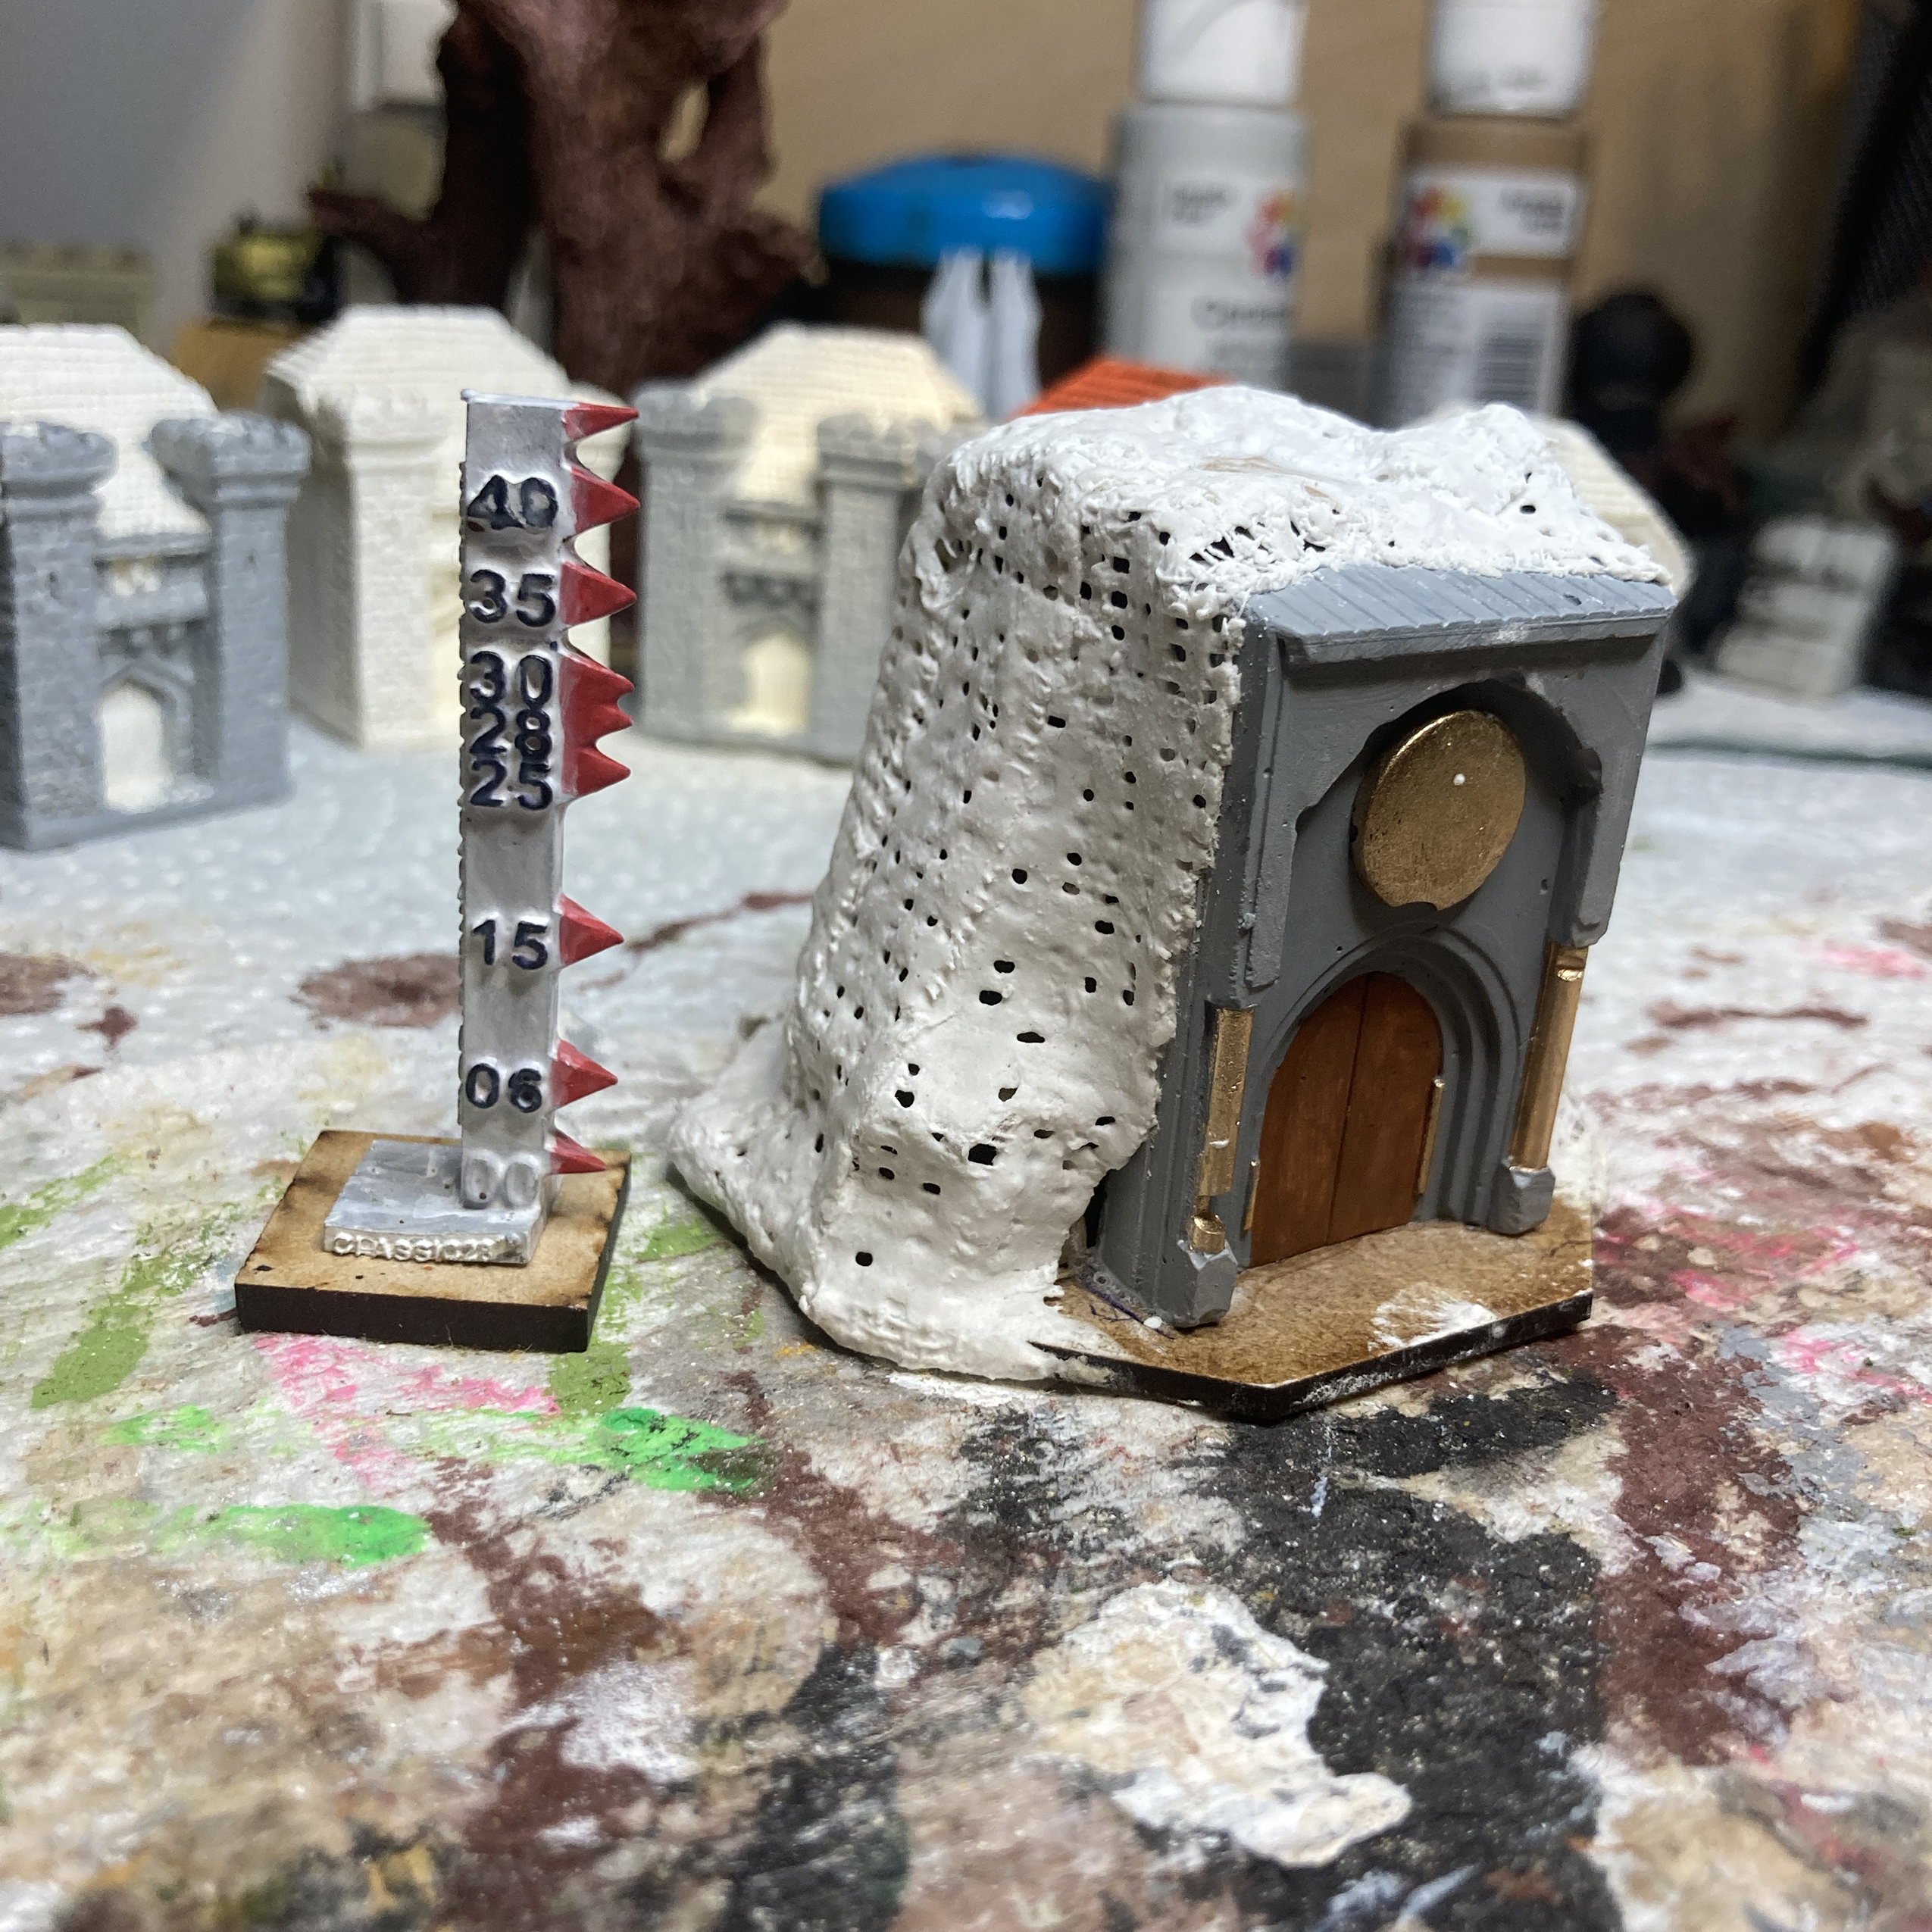
I cut plaster cloth into narrow strips, long strips. This granted me more control over how I’d lay them on, but would make them less likely to warp or crack once dried. Dipping them in water, I overlayed them from the top, down the side, and wrapped them under the base.
I was careful not to push them too tightly against the inner foundation while layering them on. I wanted the foundation to be more for providing sturdiness and less for defining the shape’s finer details.
Step 4b: Smoothing the plaster shell and adding the statue atop the dwarven shrine

 Before the plaster cloth strips dried entirely dried, I used a broad, wet brush to add more water to them. I then gently rubbed my fingers on them to smear the plaster around and cover the holes in it. This would give the plaster shell a smoother feel and allow it to more easily retain paint without it falling through the holes. (Note: plaster cloth is also great because the plaster retains paint really well and doesn’t need to be primed.)
The dwarf statue was “super” glued to the top when the plaster cloth dried.
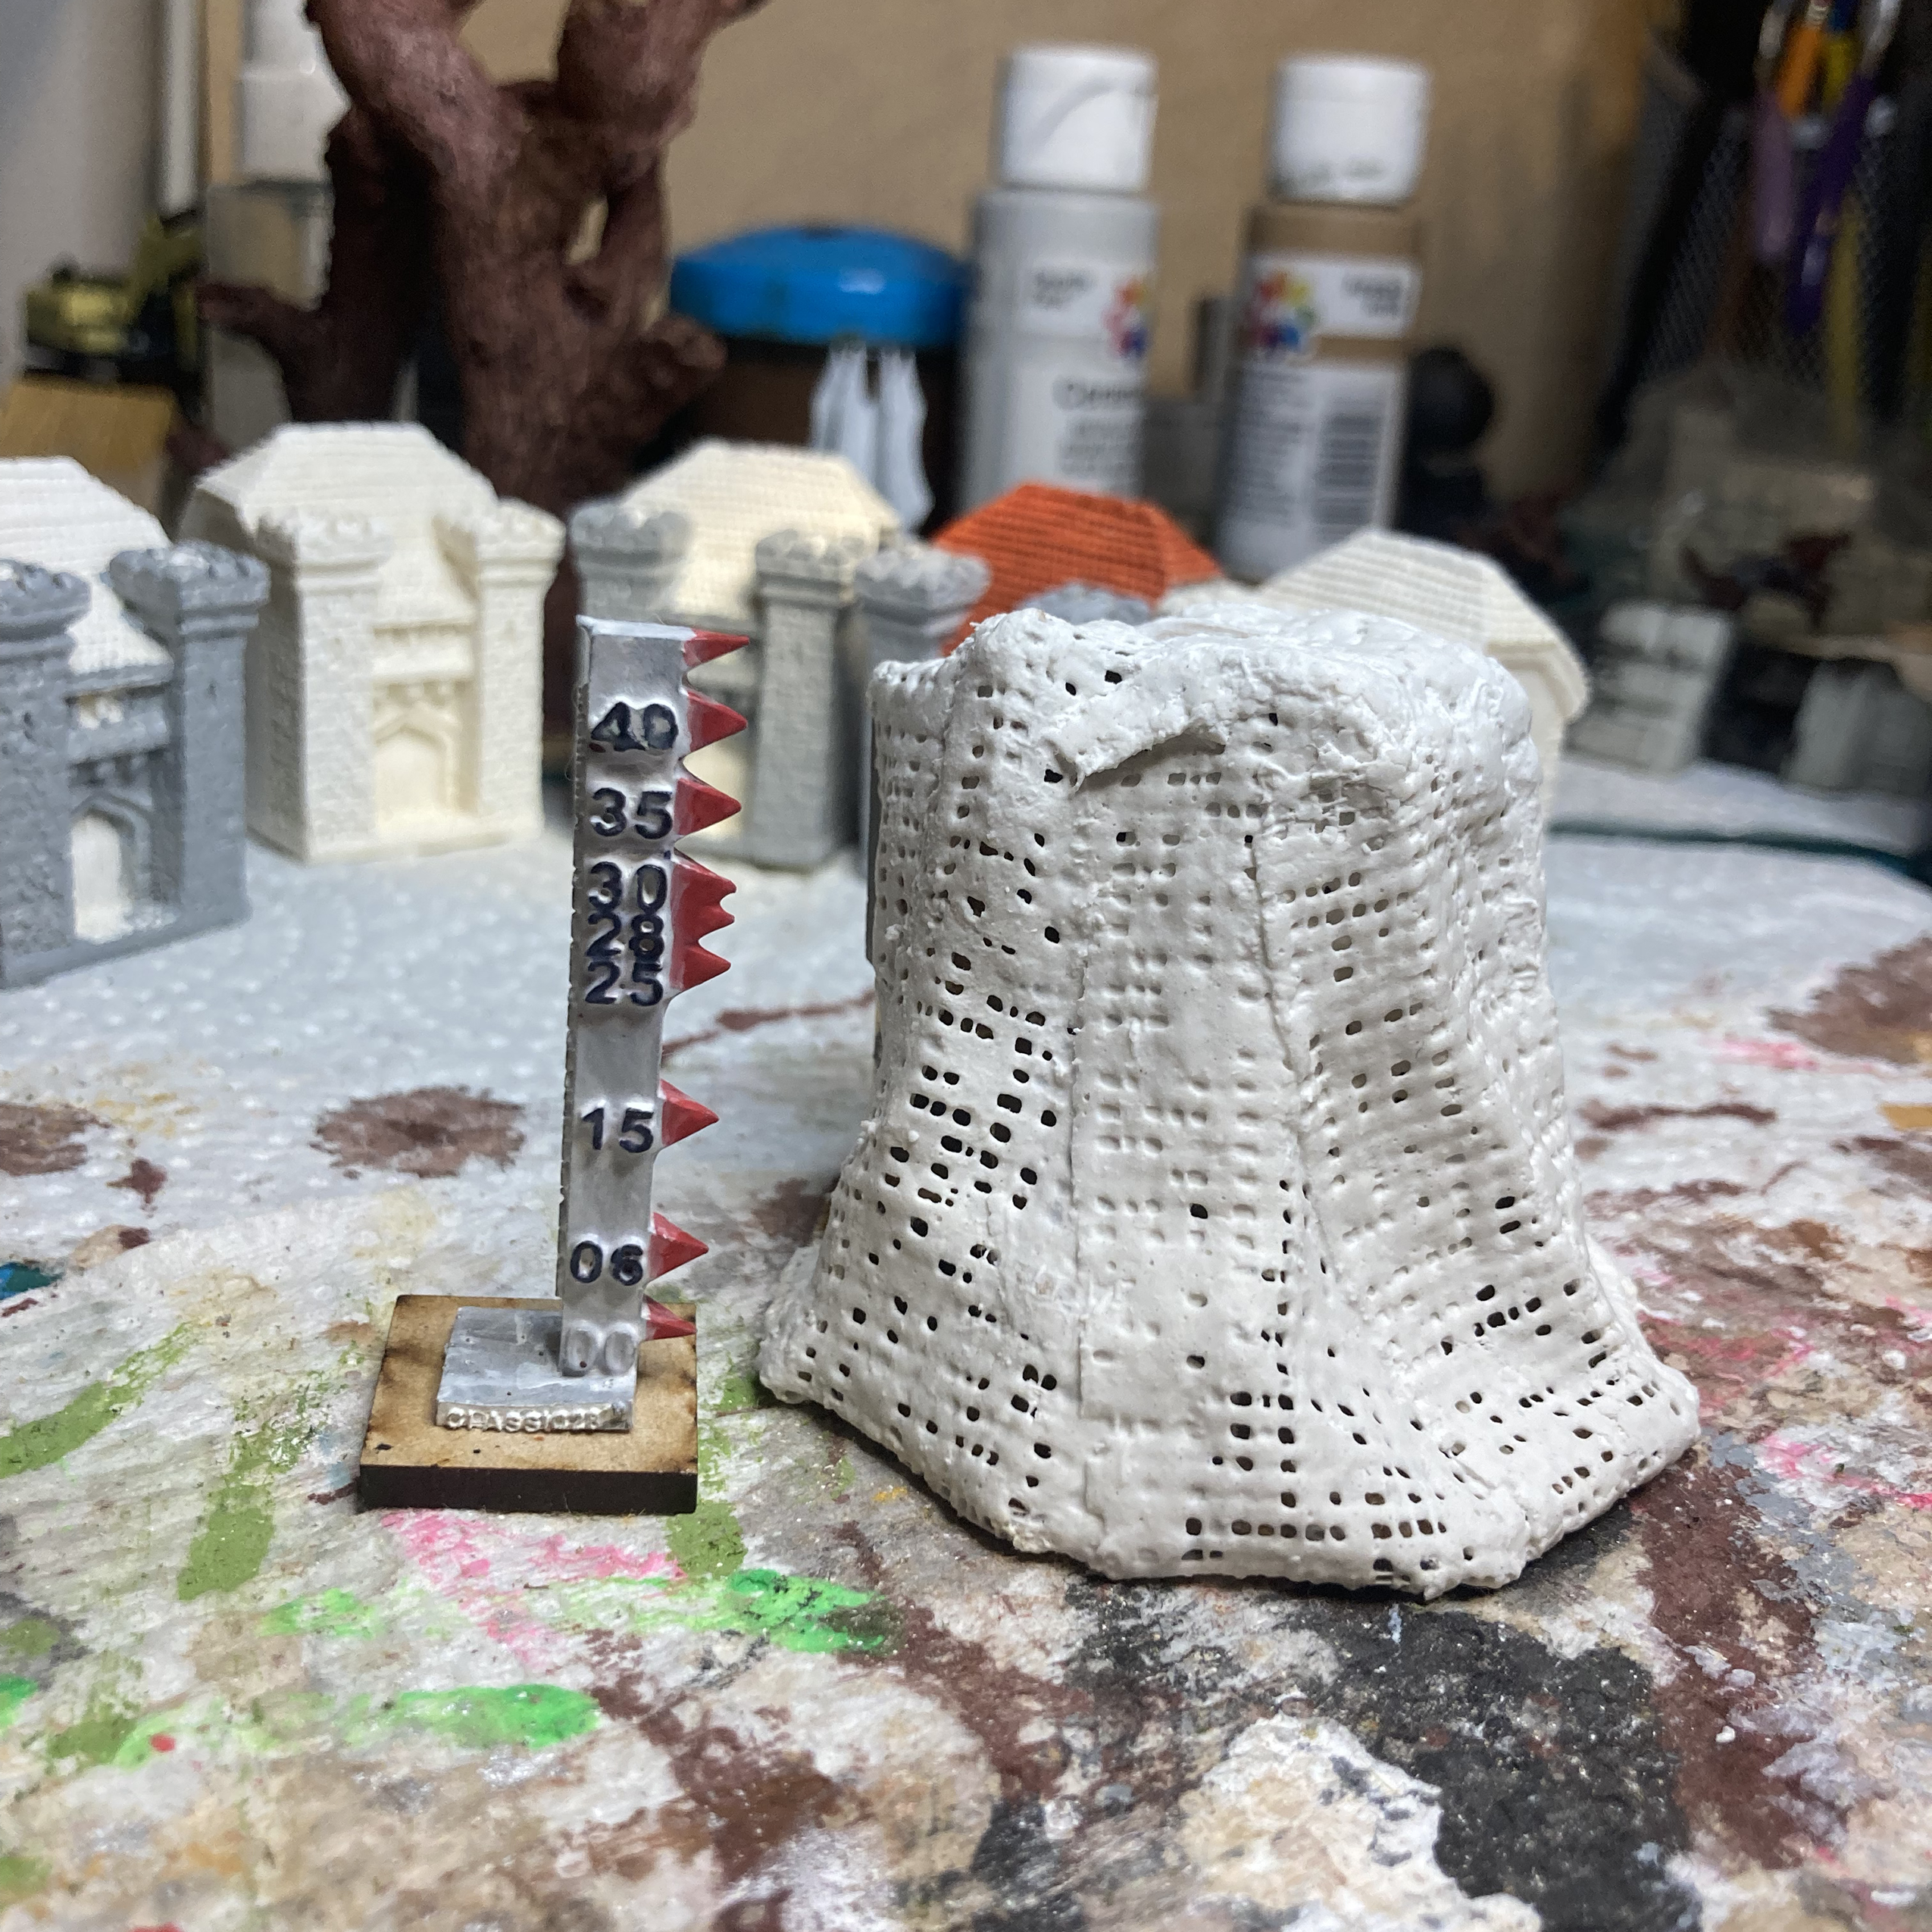
There were some holes to seal where the plaster cloth met the door and its “stone” frame. (The holes can be seen in the previous photos.) I also wanted to shape the shell of my dwarven shrine a bit more. So, I mixed a small batch of casting plaster and used it to seal the holes, do a bit of sculpting, and also hide the “statue’s” plastic base while integrating it into the shell.
Working with casting plaster in this way is always messy. (You also have to work fast, as it dries quickly, especially in smaller batches.) I was worried that I’d accidentally get some on the statue while sealing in its base, so I went as slow as the quick-drying plaster allowed. I added the plaster using with an old size 3 paintbrush that had become too worn and messy for painting.
Step 5: Base paint coats

 Next, I needed to make the plaster shell look like stone to get that feel of the dwarven shrine being in a mountainside.
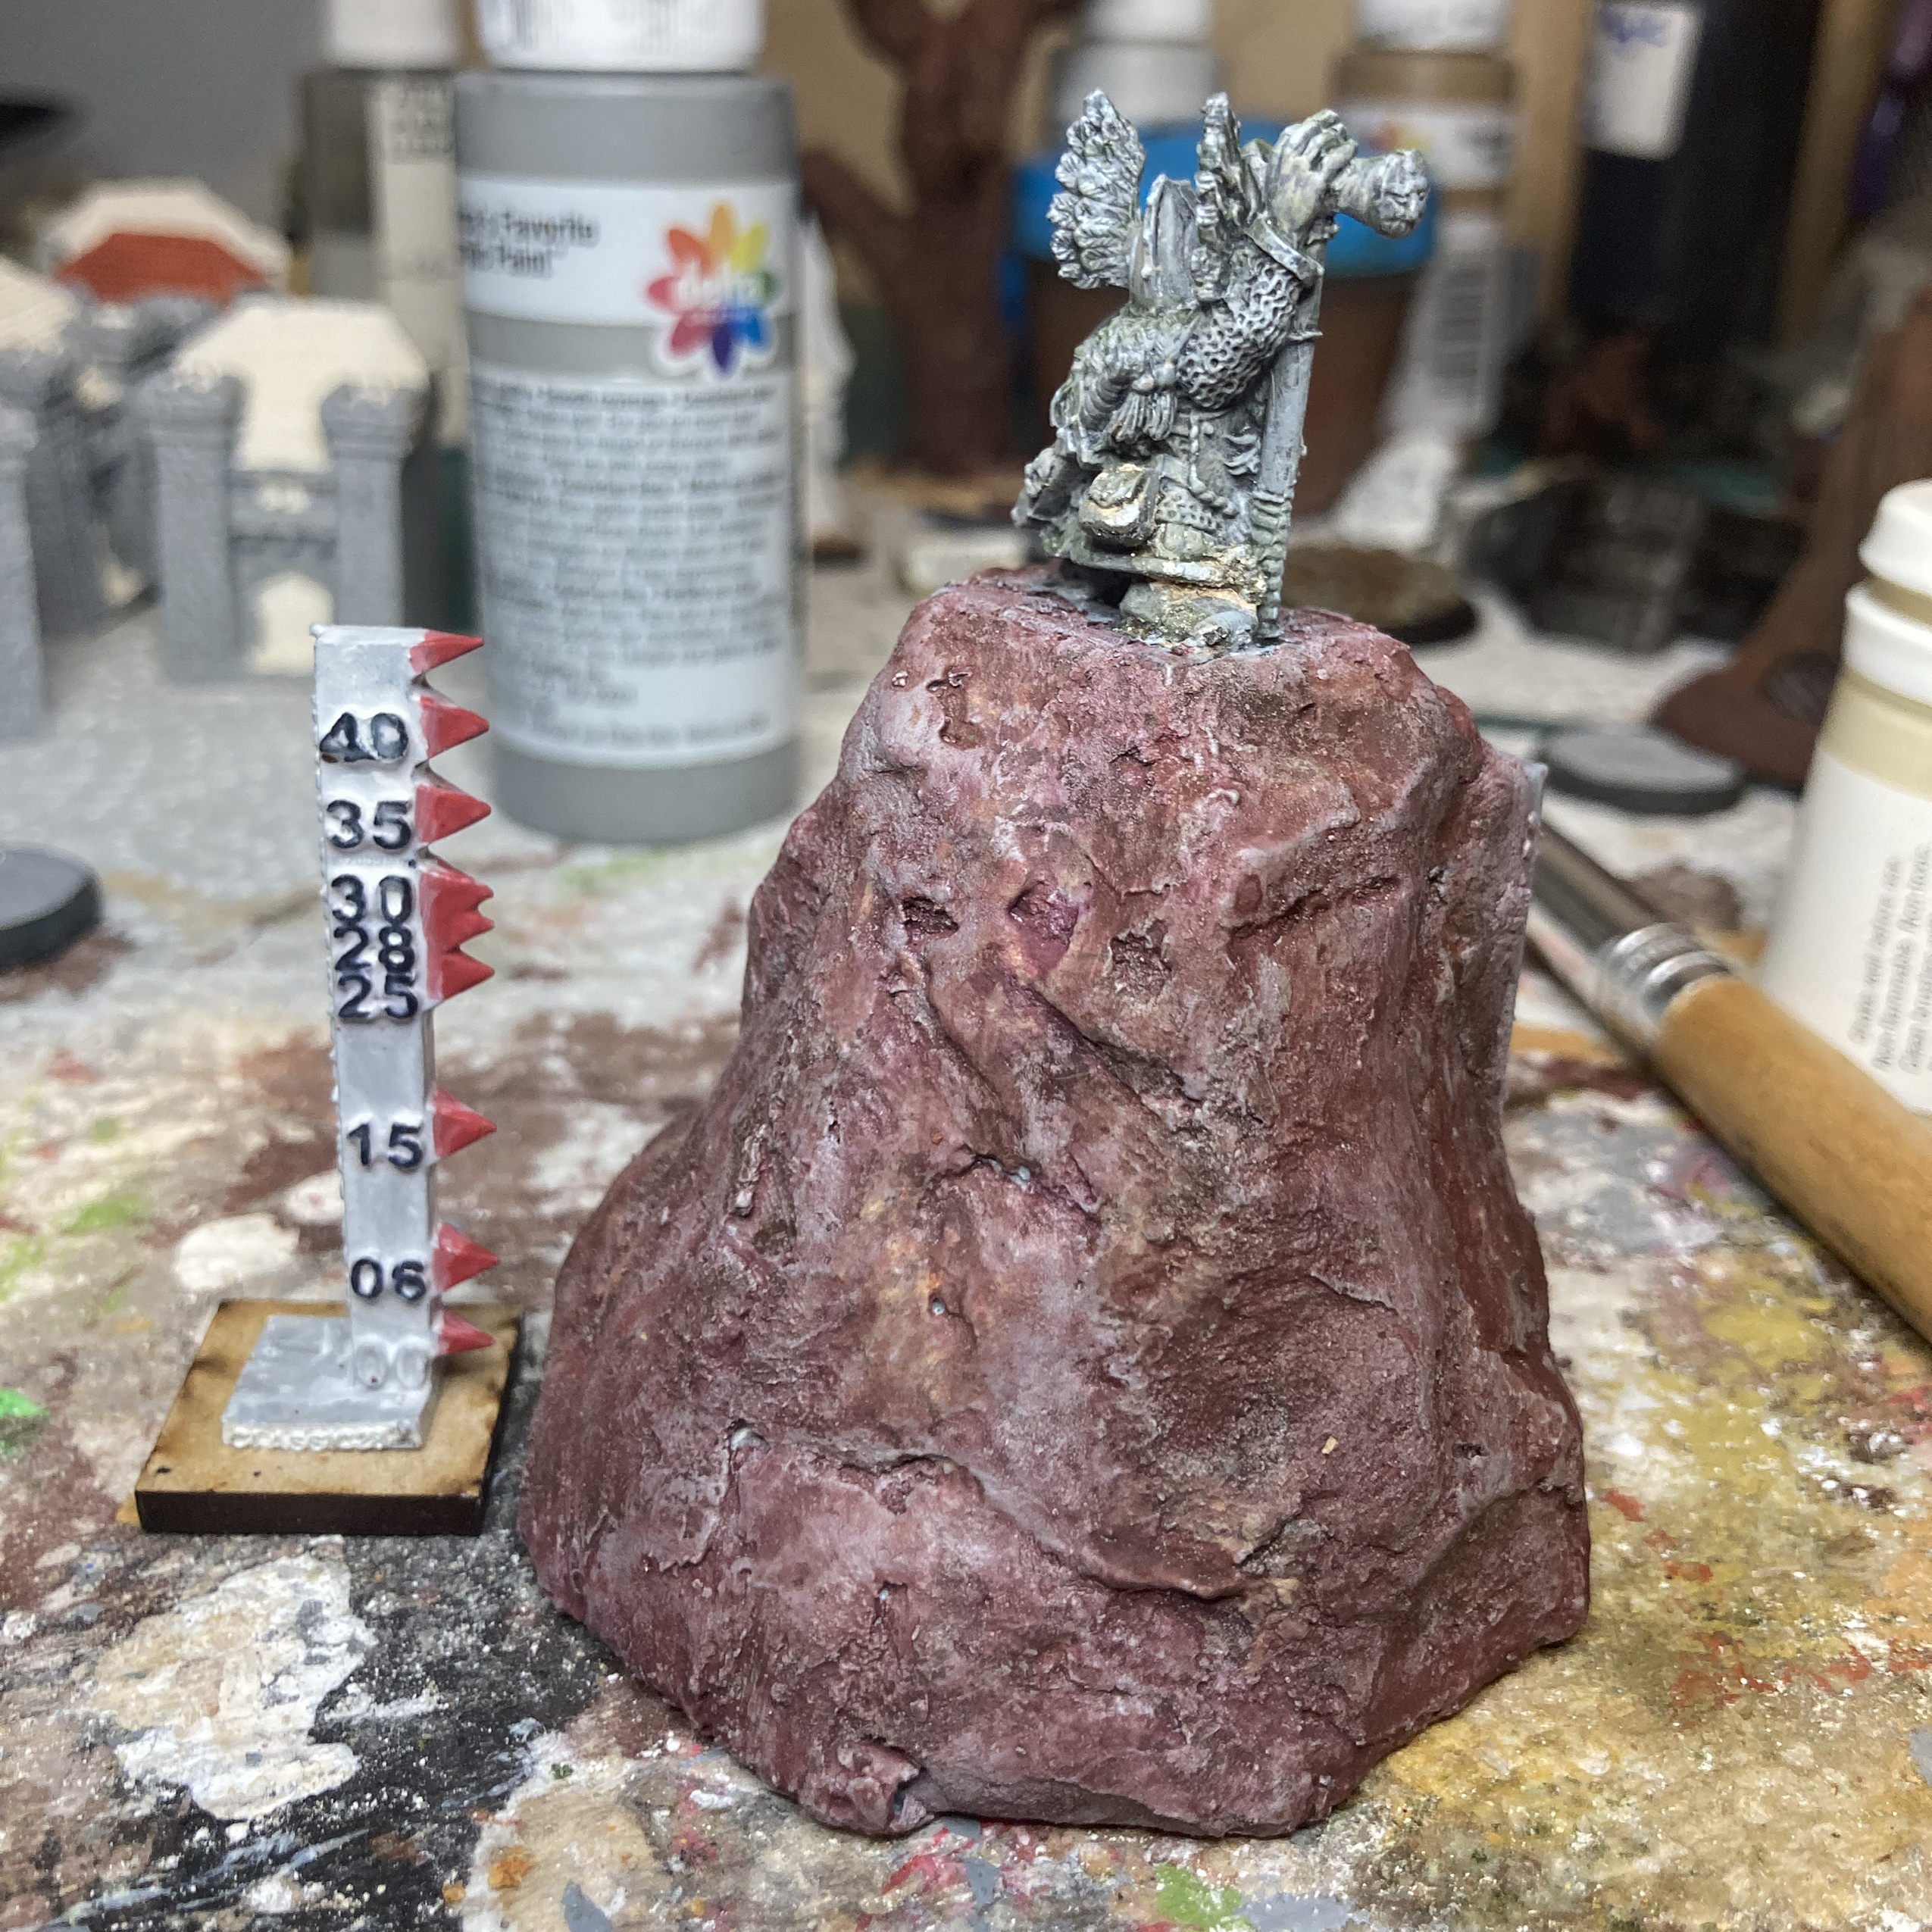
To start, I covered the plaster shell and what still showed of the MDF base in a layer of neutral grey paint. As you can see in the attached photo, this alone doesn’t look very much like stone. The grey is too uniform and flat. To change this, I needed to add some color to this undercoat for my dwarven shrine.
When the grey was dry, I mixed some red and blue paints together so that I had a reddish-brown. I wanted a result just on the verge of turning purple. Clumps of sponge dabbed this all over the plaster shell’s grey. (I left the MDF base in front of the door alone.) I followed this up with light dabs of watered-down variations of brown and a dull orange. The result still didn’t look much like stone, but I wasn’t done with my mountain.
Step 6: Dry brushing the dwarven shrine’s mountain into stone
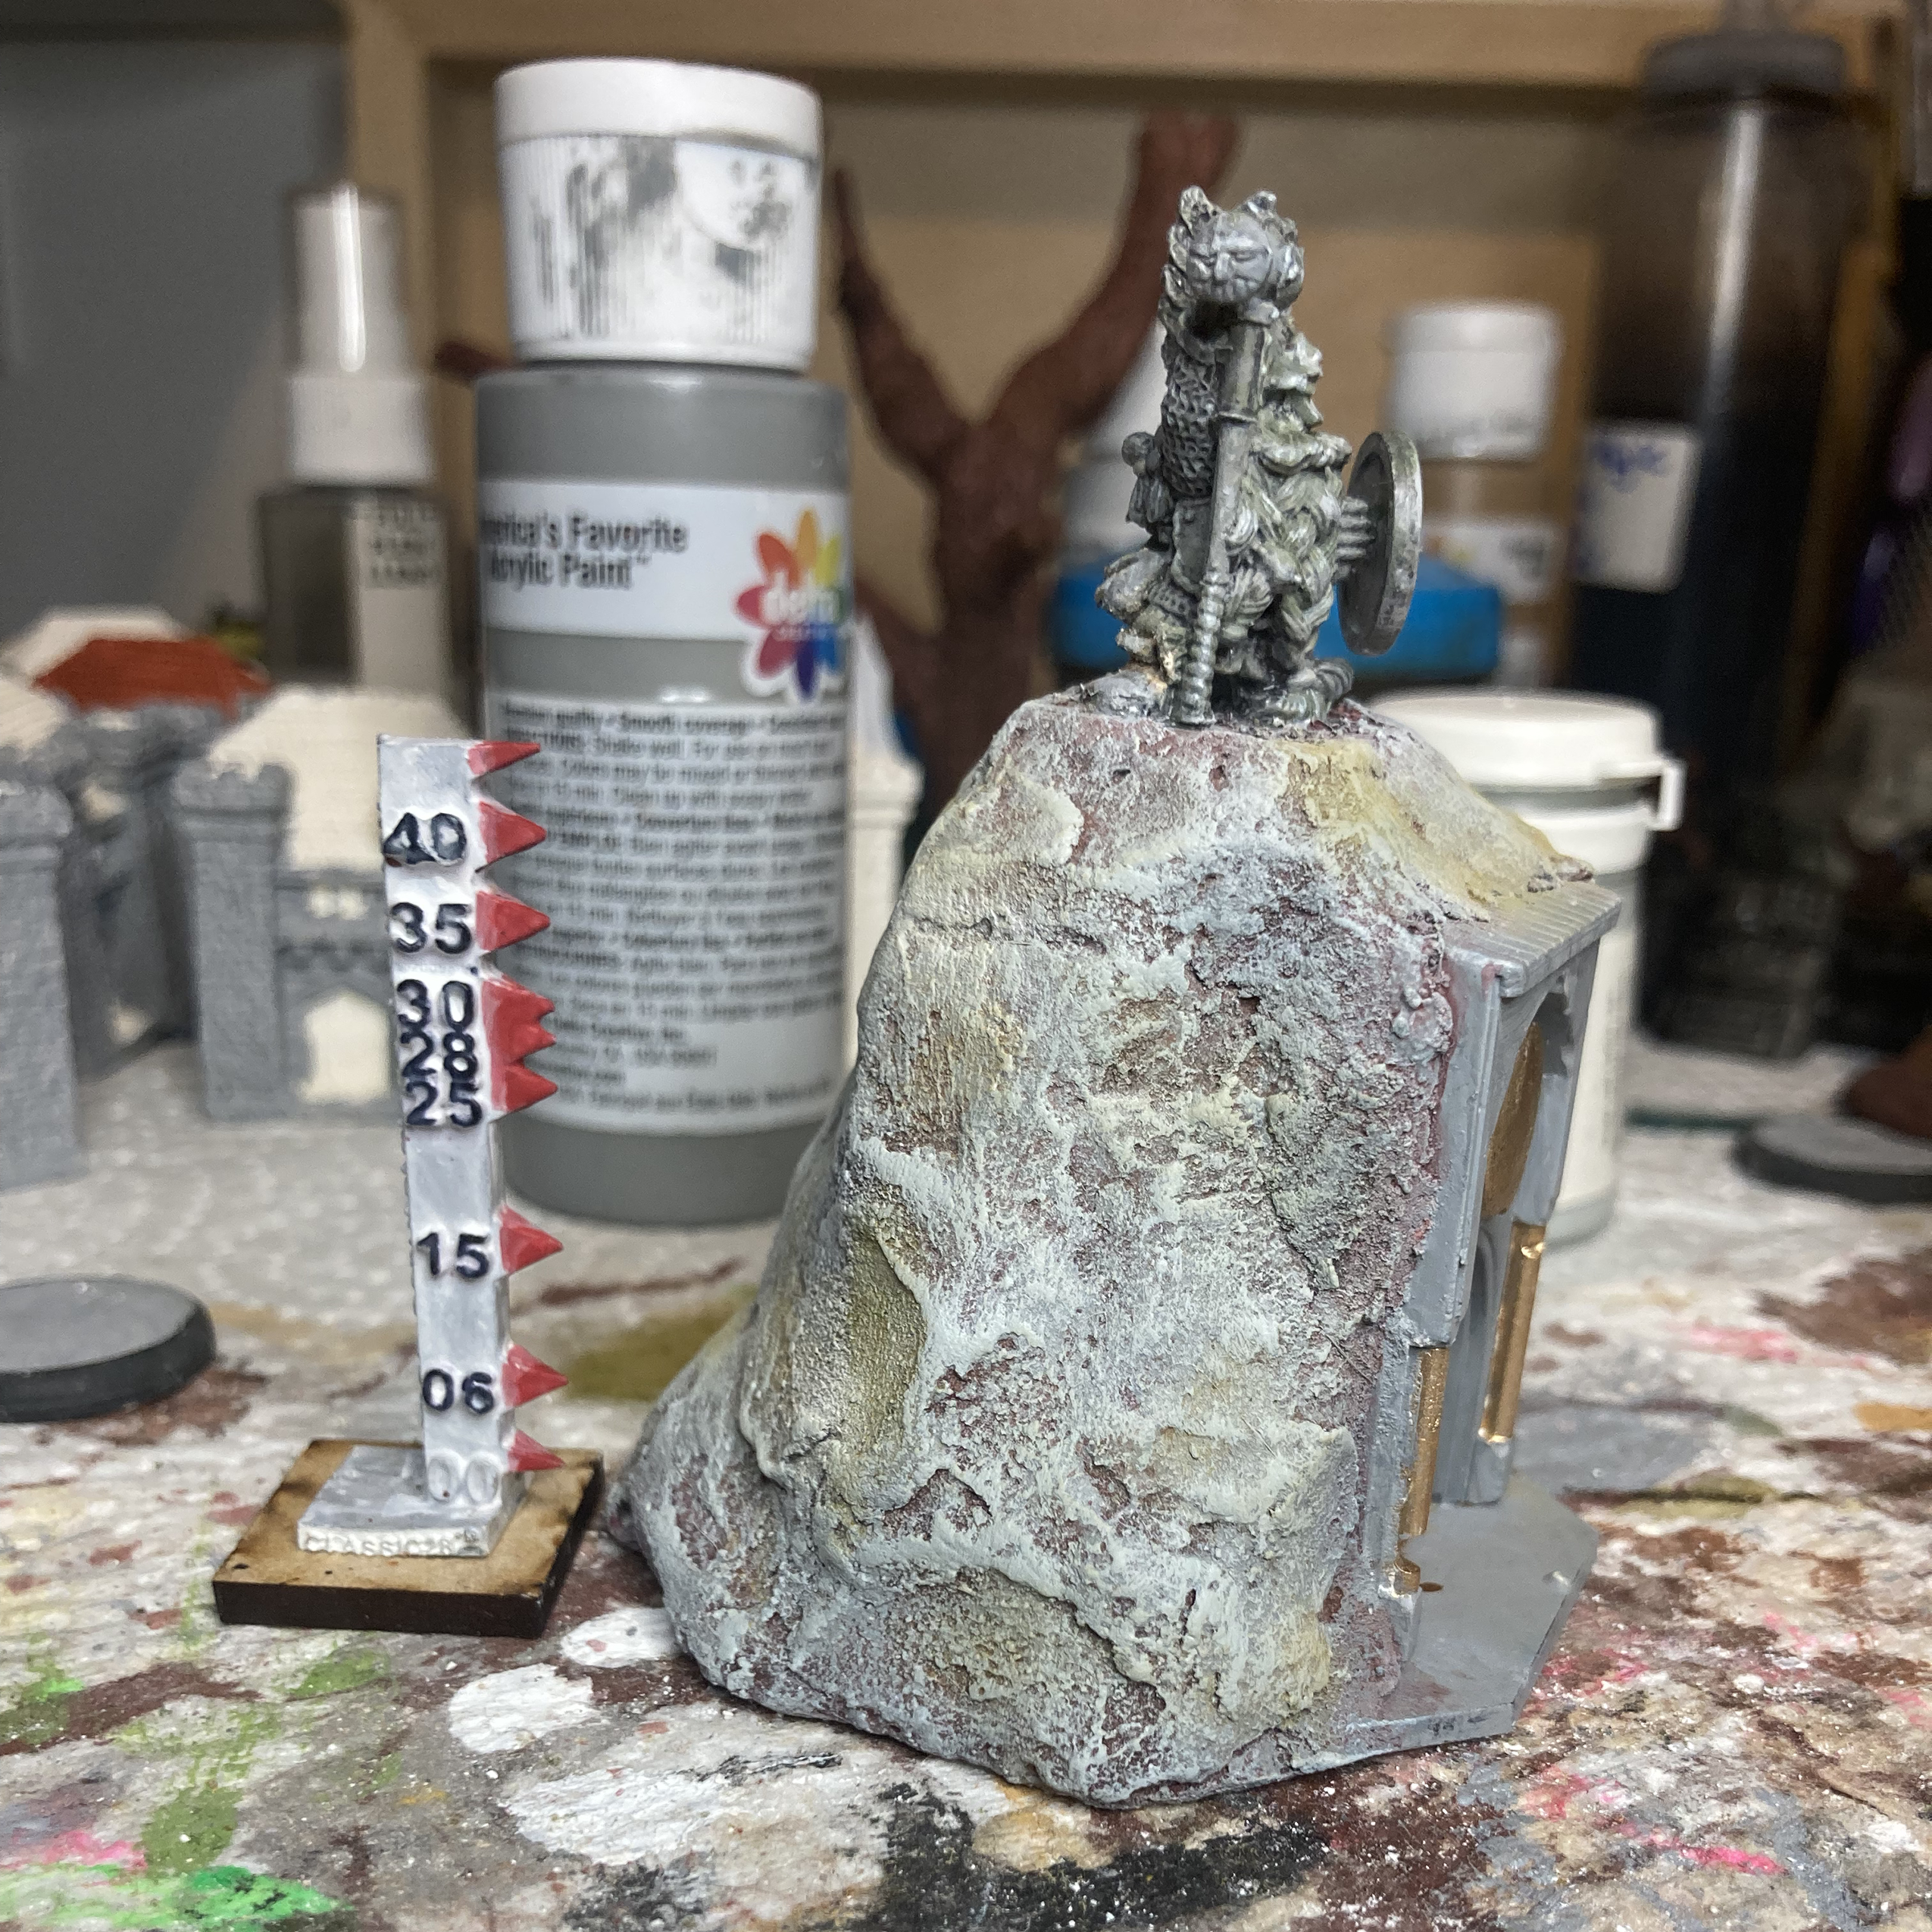
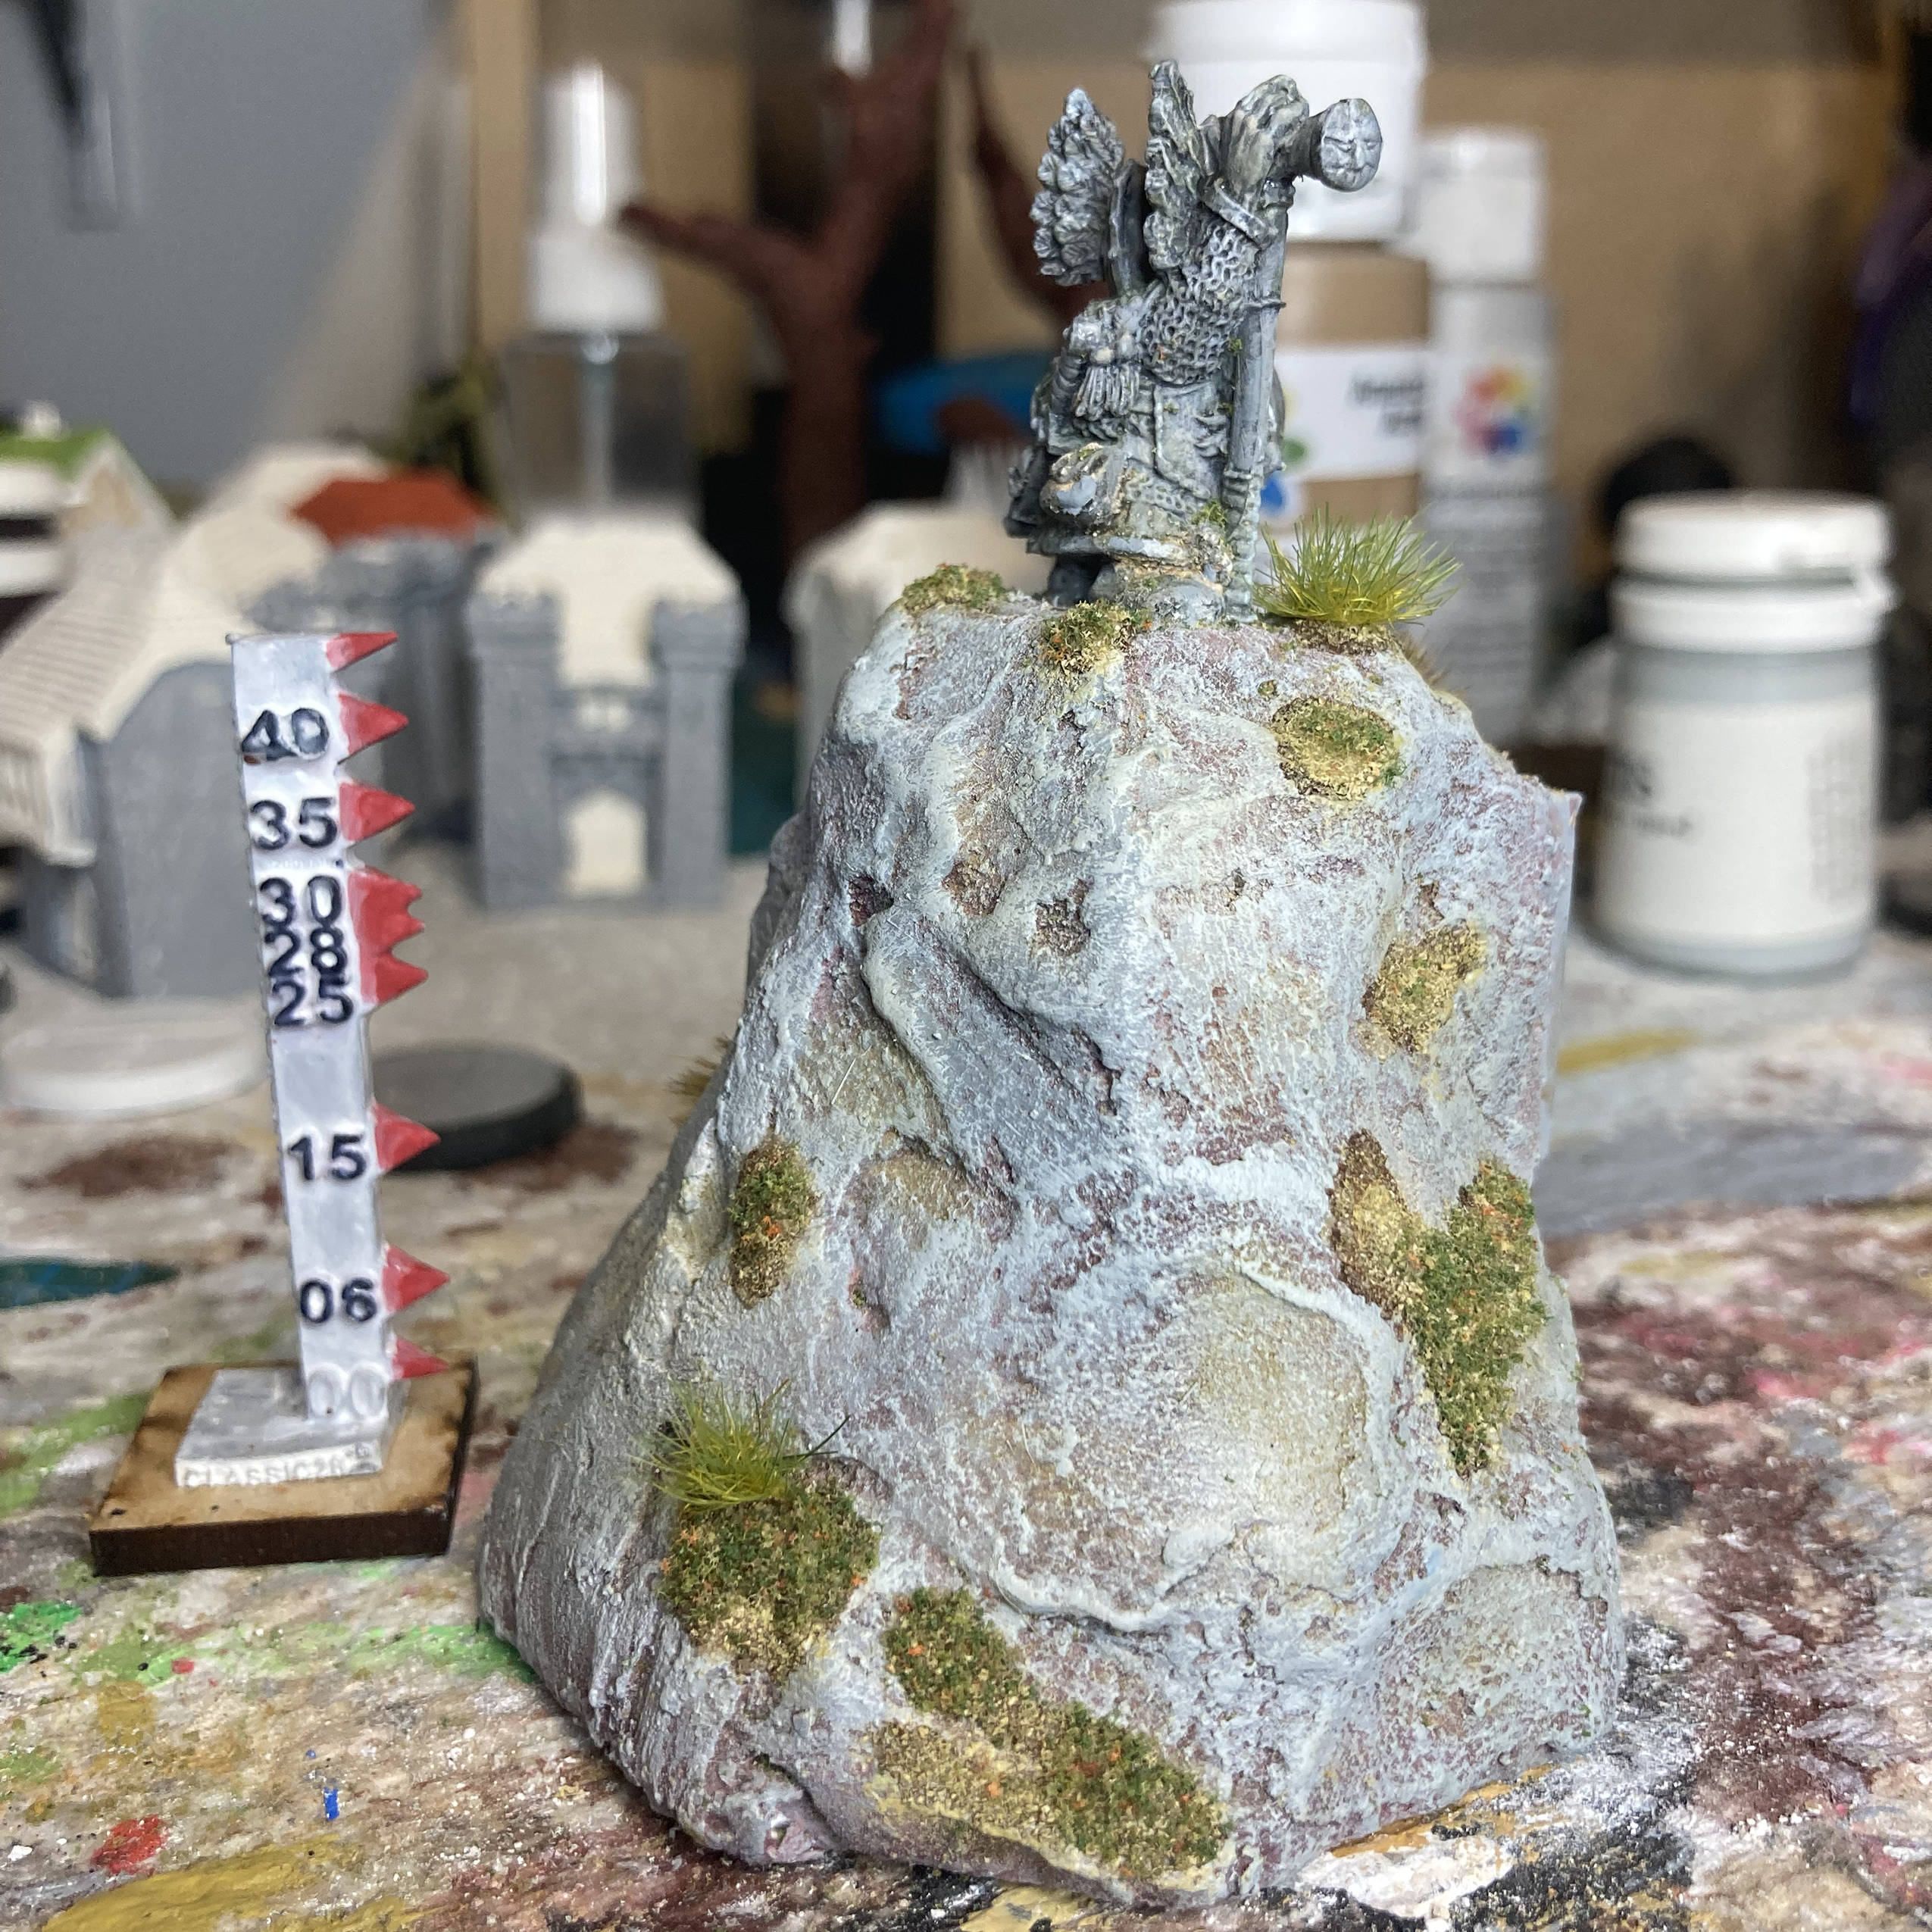
 Without entirely covering the reddish-brown undercoat, I dry brushed rain grey onto the plaster shell. This covered most of the larger areas while allowing depths such as cracks and pores to still show the undercoat. I then used a broader dry brush to lightly add elven grey to the highlights such as edges.
The result was the lighter elven grey making the edges and other raised areas stand out. The darker, rain grey combined with what could still be seen of the undercoat. The resulting blend looks much more like what you’d expect of a stone mountain face.
The final touch for this stage was lightly brushing on lichen weathering powders to the areas I thought water would gather. This gave the appearance of long exposure to the elements.
Step 7: Time to take care of the entrance

 Now that my mountain was all done except for the finishing touches, I turned my attention to the entrance to my dwarven shrine.
Looking through my miscellaneous bits and pieces, I found a flat cog intended for decorating Warhammer 40k miniatures. I added this to the gold circle above the door and used the same paint on it. Once the paint was dry, I used a brown wash on all the gold components. The wash added depth, made details stand out, and dulled the shine.
I also used some dust-colored weathering powder on the door. This gave it the appearance of long having stood against the elements. The time then came to get rid of that grey area of the MDF base.
Next, I coated the base in an 80% white glue and 20% water mixture. I then covered this with sand and allowed it to dry. (I find undiluted white glue is too thick and doesn’t allow the sand to settle properly as it dries.) Above the door got the same treatment, using it to create a transition from the plaster shell to the door. This made it look as though eons of dirt had blown and gathered here.
Only the final details and sealing/protecting the piece remained.
Step 8: The finishing touches
 As you may have noticed in the previous photos, as it was the sand was shiny and reflected light. I added a homemade brown wash (a blown die, floor polish, and water mix) to get rid of this. The wash sinks in between the sand and covers it, making it look more like dirt than sand. Once dry, I then dry-brushed a layer of a lighter brown over this. When this in turn dried, I sparsely dry-brushed tan highlights to complete the look of dirt stretching out before the entrance.
Speaking of dirt, I had been looking at my work long enough at this point to feel that the lichen alone wasn’t cutting it. So, I lightly brushed my white glue/water solution on some of the spots I felt dirt would gather. I sprinkled these spots with sand and left to dry. Next, the sand received the same wash and dry-brush process I used on the “dirt” in front of the entrance.
Once the paint dried, I again used a brush to dab on my white glue/water solution to some of the “dirt.” I then sprinkled on a 50/50 mix of my Woodland Scenics blended turf and SceneScapes ground clover. (A separate plastic shaker is used to help distribute the flocking evenly.) I prefer the mix because I find the former too dark and brown on its own. Similarly, the latter is too green and uniform. In my opinion, mixing the two creates a more realistic “grass.”
I also used some of this flocking to conceal the remaining cracks. These appeared where the plaster had pulled back from the “statue’s” base as it dried. This had the added benefit of making the statue appear to have been there a long time.
With my grass patches done, I then added a range of “dry grass” tufts to make them a little wilder. I did this along the sides, around the statue, and atop and to one side of the gate. I was careful not to overdo it, as I didn’t want long grass to detract from the stone details and dirt.
Once everything dried, I sprayed on two coats of Krylon matte finish (waiting until the first dried to do the second.) This seals everything and protects the paint, dirt, and grass from rubbing off during handling. The matte version is important so I didn’t make the piece shiny. I sometimes use Mod Podge to seal terrain, but it is more inclined to leave a sheen. Also, spray is better for smaller, highly-detailed pieces like this.
The end result is now ready to serve as an objective, entrance to an underground city, or as a dwarven shrine.
Steven Trustrum
Steven Trustrum has been writing in the RPG industry since the end of the '90s and publishing via Misfit Studios since 2003. Aside from writing and publishing role-playing game content, he ... dabbles ... in content and social media marketing.